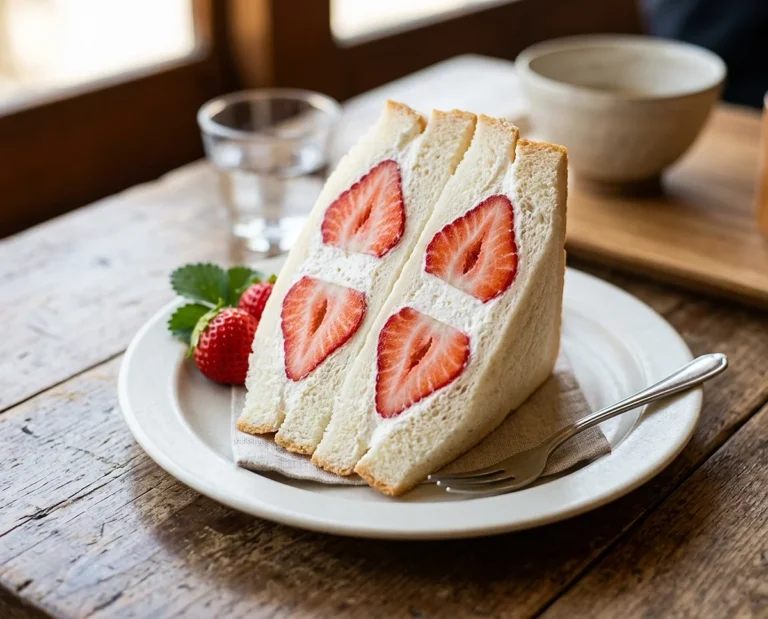
No-Bake Cherry Cheesecake
If you’re looking for an easy cherry dessert that requires zero oven time and gets devoured at every single gathering, this no-bake cherry cheesecake is your new best friend. It’s creamy, cool, and that glossy cherry topping? Absolutely irresistible.
I first made this for a summer cookout when it was way too hot to even think about turning on the oven. It disappeared in minutes — and now it’s my go-to no-bake cheesecake every single summer.
Table of Contents
What Makes This No-Bake Cherry Cheesecake So Good
Craving another stunning cherry creation that’s as easy as pie (well, easier!)? This No-Bake Cherry Cheesecake is just one delicious stop on your journey! For more showstopping, fruit-filled centerpieces, be sure to explore our delightful collection of cherry-packed layered desserts that are sure to impress.
This summer cheesecake recipe hits all the right notes — buttery graham cracker crust, silky cream cheese filling, and a gorgeous cherry topping that looks like it came from a fancy bakery. Nobody needs to know it took you 20 minutes.
It’s also incredibly forgiving. No water bath, no cracked tops, no stress. Just mix, chill, and wow everyone at the table. If you can use a hand mixer, you can absolutely nail this recipe.
Ingredients
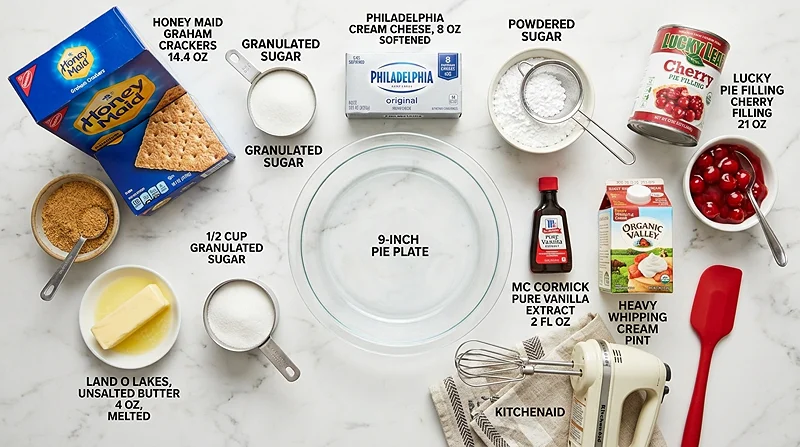
Here’s everything you’ll need, neatly grouped so you can grab it all at once before you start.
| Section | Ingredient | Amount |
|---|---|---|
| Graham Cracker Crust | Graham cracker crumbs | 1 1/4 cups |
| Graham Cracker Crust | Unsalted butter, melted | 1/4 cup |
| Graham Cracker Crust | White sugar | 1/4 cup |
| Filling | Cream cheese, softened (8 oz package) | 1 package |
| Filling | Powdered sugar | 1 cup |
| Filling | Vanilla extract | 1 teaspoon |
| Filling | Heavy whipping cream | 1 cup |
| Topping | Cherry pie filling (12.5 oz can) | 1 can |
Step-by-Step Instructions
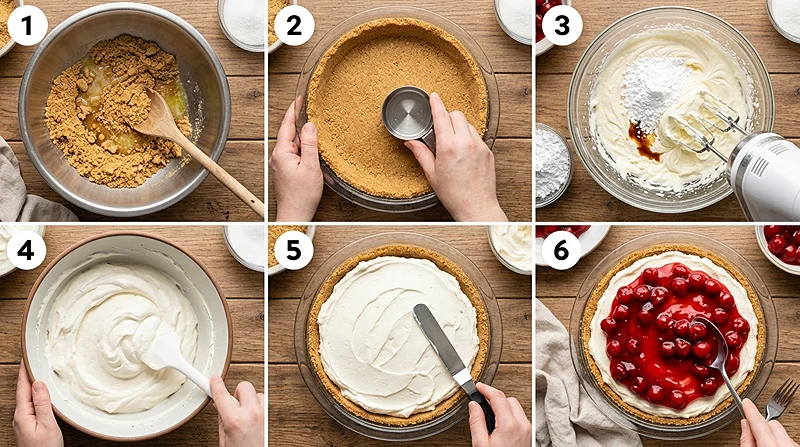
Ready to make your new favorite easy cherry dessert? Let’s walk through it together. It’s honestly simpler than it looks.
Step 1: Gather Everything First
Pull out all your ingredients before you start. Softened cream cheese is especially important here — cold cream cheese will leave lumps in your filling, and nobody wants that. Leave it on the counter for at least 30 minutes before you begin.
Step 2: Make the Graham Cracker Crust
In a medium bowl, mix your graham cracker crumbs, melted butter, and sugar together. Stir until it looks like wet sand — it should clump when you press it between your fingers.
Press the mixture firmly into a 9-inch pie plate, pushing it up the sides as much as you can. A flat-bottomed measuring cup works great for getting an even, compact layer. Pop it aside while you work on the filling.
Pro tip: Don’t skip pressing the crust firmly — a loose crust will crumble when you slice it. Put some muscle into it!
Step 3: Beat the Cream Cheese Filling
In a large bowl, beat the softened cream cheese, powdered sugar, and vanilla extract together with an electric mixer. Mix until it’s completely smooth and almost fluffy — this usually takes about 2 minutes on medium speed.
Scrape down the sides of the bowl a couple of times to make sure everything gets mixed in evenly. The filling should look thick, creamy, and spreadable at this point. It smells amazing already, trust me.
Step 4: Whip the Cream
Here’s the step that takes this no-bake cheesecake from good to absolutely dreamy. In a chilled metal or glass bowl, beat the heavy whipping cream with your electric mixer until soft peaks form.
Chilling your bowl first makes the cream whip up faster and fuller. Once you have soft peaks — meaning the cream holds its shape but the tip curls over gently — you’re ready to fold it in.
Don’t overbeat! If you go too far, the cream will turn grainy and start to separate. Soft peaks are your friend here.
Step 5: Fold the Whipped Cream Into the Filling
Gently fold your whipped cream into the cream cheese mixture using a rubber spatula. Use slow, sweeping motions from the bottom of the bowl up and over. You want to keep the airiness you just whipped in — no aggressive stirring allowed.
Keep folding until the mixture is smooth and uniform, with no white streaks remaining. The texture should be light, mousse-like, and absolutely luscious. You’ll want to eat it straight from the bowl — and honestly, a small taste test is highly encouraged.
Step 6: Fill and Chill
Pour the filling into your prepared graham cracker crust and smooth the top with a spatula. Get it as even as you can — a flat top means a prettier presentation when you add the cherry topping later.
Cover loosely with plastic wrap and refrigerate for at least 2 to 3 hours. Overnight is even better if you can wait! The longer it chills, the firmer and more sliceable it becomes. This is the hardest part of the whole recipe — the waiting.
Step 7: Add the Cherry Topping and Serve
Once the cheesecake is firm and set, spread the cherry pie filling over the top. You can go edge-to-edge for full coverage, or just pile it in the center for a more rustic look. Both are stunning, and both taste incredible.
Slice and serve immediately, or keep it refrigerated until you’re ready. Either way, this no-bake cherry cheesecake is about to become everyone’s favorite summer cheesecake recipe at the table.
Expert Tips, Variations, and Troubleshooting
Tips for the Best Results
Use full-fat cream cheese. Low-fat versions have more moisture and can make the filling runny. Full-fat gives you that dense, creamy texture you’re going for with a no-bake cheesecake.
Don’t rush the chill time. Two hours is the minimum, but 4 to 6 hours gives you a much cleaner slice. If you’re making it for a party, prepare it the night before and thank yourself later.
Chill your bowl and beaters before whipping the cream. This is a small step that makes a big difference. Pop them in the freezer for 10 minutes before you start — your cream will whip up faster and hold its shape better.
Fun Variations to Try
Swap the topping. The recipe calls for cherry pie filling, but strawberry, blueberry, or peach filling all work beautifully. Mix it up based on what’s in season or what you have on hand.
Try a chocolate crust. Use chocolate graham crackers or Oreo crumbs instead of regular graham crackers for a chocolate-cherry combo that tastes like a Black Forest cake.
If you love easy, crowd-pleasing summer desserts like this one, you’ll also want to check out these homemade strawberry ice cream sandwiches — another no-fuss recipe that always disappears fast.
Troubleshooting Common Issues
Filling is too soft and won’t hold shape? The cream cheese may have been too warm, or the cream wasn’t whipped to soft peaks. Make sure everything is properly chilled next time, and give it more fridge time before serving.
Crust is crumbling when you slice? It wasn’t pressed firmly enough, or it didn’t chill long enough. Give the whole cheesecake at least 3 hours in the fridge — the cold sets both the filling and the crust into one cohesive slice.
Filling has lumps? Your cream cheese was too cold when you started. Always let it soften at room temperature for at least 30 minutes before beating. You can also microwave it in 10-second bursts, but go carefully.
Storage Instructions
This no-bake cheesecake stores really well, making it perfect for making ahead of time. Here’s how to keep it fresh:
| Storage Method | Duration | Notes |
|---|---|---|
| Refrigerator (covered) | Up to 5 days | Cover tightly with plastic wrap or store in an airtight container |
| Freezer (without topping) | Up to 1 month | Wrap tightly in plastic wrap, then foil. Add cherry topping after thawing. |
| Freezer (with topping) | Not recommended | Cherry filling can become watery after freezing and thawing |
To thaw a frozen cheesecake, move it to the refrigerator overnight. Never thaw at room temperature — the filling can become too soft and lose its shape.
Reheating and No-Waste Ideas
This easy cherry dessert is best served cold, so there’s no reheating involved. If the cheesecake has been in the fridge and feels a little too firm, just let it sit at room temperature for 5 to 10 minutes before slicing.
Got leftover crust mixture? Press it into a small baking dish and use it as the base for a quick high-protein egg bite bake — the buttery crumble adds a surprisingly great texture.
Extra cherry filling? Spoon it over pancakes, waffles, yogurt parfaits, or vanilla ice cream. Nothing goes to waste in this kitchen.
Nutritional Information
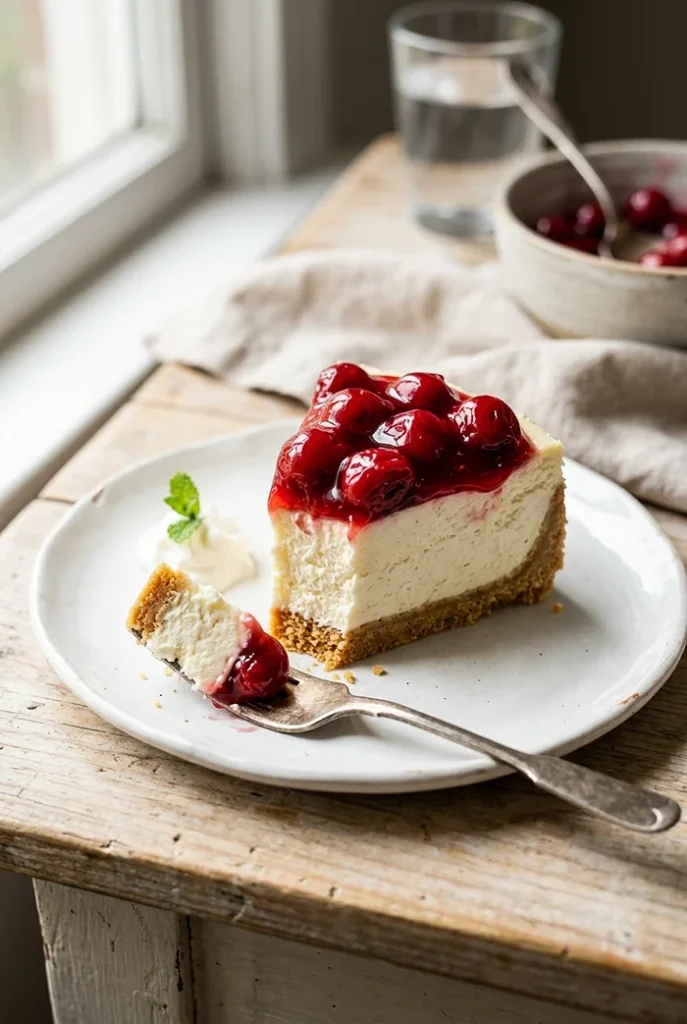
Here’s an approximate nutritional breakdown per serving, based on 8 servings. Keep in mind these are estimates and can vary depending on brands used.
| Nutrient | Per Serving (approx.) |
|---|---|
| Calories | ~420 kcal |
| Total Fat | ~28g |
| Saturated Fat | ~16g |
| Carbohydrates | ~38g |
| Sugar | ~27g |
| Protein | ~4g |
| Sodium | ~220mg |
This is a dessert, so enjoy it for what it is — a special, creamy, delicious treat. For lighter everyday options, check out these high-protein burger bowls that are just as satisfying but much more macro-friendly.
Frequently Asked Questions
Can I make this no-bake cherry cheesecake ahead of time?
Yes, and it’s actually better when made ahead! Prepare the cheesecake (without the cherry topping) and refrigerate it overnight. Add the cherry filling right before serving for the freshest look and best texture.
Can I use homemade whipped cream instead of heavy cream?
You can, but make sure it’s freshly whipped and held to soft peaks. Avoid using store-bought whipped topping like Cool Whip — it changes the texture and the cheesecake won’t set as firmly as a classic no-bake cheesecake should.
What can I use instead of graham crackers for the crust?
Digestive biscuits, Oreos, vanilla wafers, or even shortbread cookies all work great as a crust base. Just crush them finely and combine with the same amount of butter and sugar. Each one gives the easy cherry dessert a slightly different flavor profile.
Why isn’t my filling setting up properly?
The most common culprits are cream cheese that wasn’t fully softened, cream that wasn’t whipped to soft peaks, or not enough chill time. Make sure you refrigerate for at least 2 to 3 hours — longer is always better for a firm, sliceable summer cheesecake recipe.
Can I use fresh cherries instead of canned cherry pie filling?
Absolutely! Cook down about 2 cups of pitted fresh cherries with 1/4 cup sugar and a tablespoon of cornstarch over medium heat until thick and glossy. Let it cool completely before spreading over the chilled cheesecake.
Try It and Share the Love
This no-bake cherry cheesecake is one of those recipes you’ll come back to all summer long. It’s effortless, stunning, and tastes like something that took way more effort than it actually did.
If you made this and loved it (or even just liked it a little), I’d love to hear about it! Leave a comment below and let me know how it turned out. And if you’re a fan of easy, satisfying recipes, you might also enjoy these loaded taco rice bowls or this foolproof sushi rice recipe for your next dinner.
Save this recipe to your Pinterest boards so you can find it easily all season long — it’s the kind of easy cherry dessert that deserves a permanent spot in your collection. Happy no-baking!
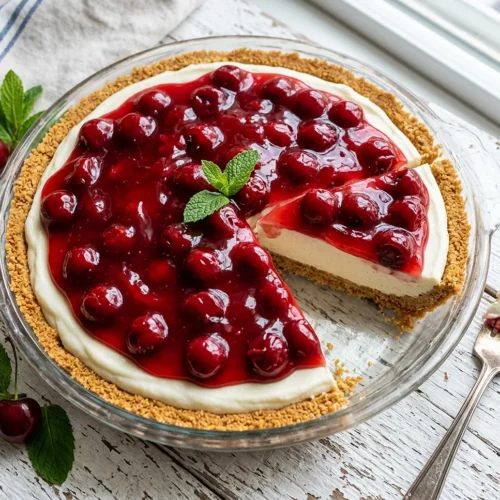
The Most Dreamy No-Bake Cherry Cheesecake You’ll Ever Make
Equipment
- Medium bowl
- Large bowl
- Electric mixer
- Rubber spatula
- 9-inch pie plate
- Measuring Cup
Ingredients
Graham Cracker Crust
- 1 ¼ cups Graham cracker crumbs
- ¼ cup Unsalted butter melted
- ¼ cup White sugar
Filling
- 1 package Cream cheese softened, 8 oz package
- 1 cup Powdered sugar
- 1 teaspoon Vanilla extract
- 1 cup Heavy whipping cream
Topping
- 1 can Cherry pie filling 12.5 oz can
Instructions
- Gather all ingredients and allow the cream cheese to soften at room temperature for at least 30 minutes.
- In a medium bowl, combine graham cracker crumbs, melted butter, and sugar until the mixture resembles wet sand.
- Press the crust mixture firmly into a 9-inch pie plate, covering the bottom and sides evenly.
- In a large bowl, beat the softened cream cheese, powdered sugar, and vanilla extract until smooth and fluffy.
- In a chilled bowl, whip the heavy cream until soft peaks form.
- Gently fold the whipped cream into the cream cheese mixture until smooth and fully combined.
- Spread the filling into the prepared crust and smooth the top.
- Cover and refrigerate for at least 2 to 3 hours, or until firm.
- Top with cherry pie filling, slice, and serve chilled.