Gluten Free Bread Recipe
Craving a soft, fluffy gluten free bread recipe that doesn’t taste like cardboard? This loaf is golden on the outside, tender on the inside, and shockingly easy to pull off, even if yeast baking makes you nervous.
I stumbled onto this recipe after years of sad, crumbly GF bread disappointments. One bite of this and I genuinely texted my mom to tell her gluten free bread was good now. She didn’t believe me, so I made her a loaf. Now she asks for it every week.
Table of Contents
Why You’ll Love This Gluten Free Bread Recipe
Can’t get enough of these flavors? You’re going to love what’s waiting in the lineup. Every single recipe is made to impress without the stress. Happy cooking, friend!
This is the kind of soft gluten free bread that actually holds together for a sandwich. No crumbling, no gumminess, just a proper slice of bread you’ll be proud of.
It uses pantry-friendly ingredients, comes together in one bowl, and the rise time is only 30 minutes. Honestly, it’s faster than a run to the store.
Whether you’re new to gluten free baking or a seasoned pro, this healthy gluten free bread delivers every single time. It’s the recipe you’ll bookmark, make twice, and share with everyone you know who eats GF.
Ingredients You’ll Need
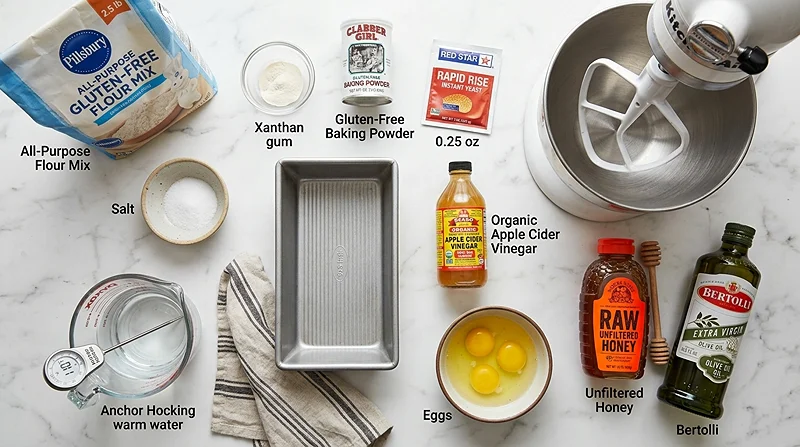
Getting the right gluten free flour blend is the most important step here. Not all blends behave the same way, especially with yeast. Stick with Pillsbury gluten-free flour for the best results.
Bob’s Red Mill 1 for 1 and King Arthur Measure for Measure both note on their packaging that their blends are not recommended for yeast baking. Heads up before you grab the wrong bag!
| Category | Ingredient | Notes |
|---|---|---|
| Dry Ingredients | 2 1/2 cups all-purpose gluten-free flour | Pillsbury gluten-free recommended |
| Dry Ingredients | 1 teaspoon xanthan gum | Leave out if your flour blend already contains it |
| Dry Ingredients | 1 teaspoon gluten-free baking powder | |
| Dry Ingredients | 1 packet rapid rise/instant yeast (2 1/4 tsp) | Must be instant yeast, not active dry |
| Wet Ingredients | 1/4 cup extra virgin olive oil | |
| Wet Ingredients | 1/4 cup honey | Sub agave nectar or maple syrup if preferred |
| Wet Ingredients | 1 teaspoon apple cider vinegar | |
| Wet Ingredients | 1 1/2 cups warm water | 100-110 degrees F is the sweet spot |
| Wet Ingredients | 3 egg whites, room temperature | From large eggs; room temp is key |
| Seasoning | 1 teaspoon salt |
Step-by-Step Instructions
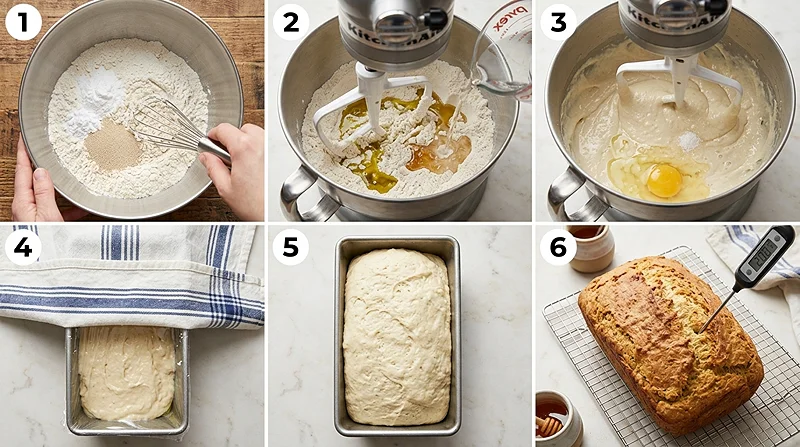
Step 1 – Get Your Pan and Oven Ready
Spray a 9×5-inch bread pan or a 9×4-inch small Pullman loaf pan generously with gluten-free cooking spray. Move your oven rack to the middle position, then preheat to 350 degrees F.
A small Pullman loaf pan is highly recommended here. It gives you that perfectly shaped, bakery-style loaf that slices beautifully. If you have one, use it.
Step 2 – Mix the Dry Ingredients
Add the gluten-free flour, baking powder, and instant yeast to a large mixing bowl. Give everything a good stir to combine before adding anything wet.
This is also where you’d add the xanthan gum, but only if your flour blend doesn’t already contain it. Flip that bag over and check the label to be sure.
Step 3 – Add the Wet Ingredients
Pour in the olive oil, honey, apple cider vinegar, and warm water. Mix on low speed for about 1 minute until everything is just combined.
If you’re using a stand mixer, grab the paddle attachment, not the dough hook. GF bread batter is more like a thick cake batter than traditional dough, so the paddle works better here.
Step 4 – Bring It All Together
Add the egg whites and salt to the batter and mix on medium speed for another minute. Don’t be alarmed when it looks like thick cake batter rather than bread dough. That’s exactly what you want.
The egg whites are doing a lot of heavy lifting in this fluffy gluten free bread. They trap air and give the loaf that light, open crumb that makes every slice satisfying.
Step 5 – Pan and Rise
Pour the batter into your greased loaf pan and smooth the top with a wet spatula. Spray a sheet of plastic wrap with cooking spray and lay it gently over the top of the pan.
Cover that with a clean kitchen towel and set it somewhere warm to rise for 30 minutes. Near a warm oven works great. You’re looking for the dough to puff up nicely over the rim.
Step 6 – Bake It
Slide the pan onto the middle oven rack horizontally and bake at 350 degrees F for 30 minutes. The top should turn a gorgeous golden brown.
To check for doneness, use an instant-read thermometer. The internal temperature should land between 205-210 degrees F. That range is the golden zone for a fully baked, not-gummy loaf.
Step 7 – Cool It Properly
Let the loaf cool in the pan for exactly 10 minutes, then transfer it to a wire rack. Do not let it cool completely in the pan. Steam gets trapped underneath and you’ll end up with a soggy bottom.
Let the bread cool completely before slicing. I know it smells incredible and waiting is hard, but slicing too soon compresses the crumb and you’ll lose that fluffy texture you worked for.
Step 8 – Slice the Right Way
Always use a serrated bread knife to cut this loaf. A smooth-blade knife will squish the bread and flatten those gorgeous air pockets inside. A good serrated knife glides right through.
Expert Tips for the Best Fluffy Gluten Free Bread
Temperature Matters
Your warm water should be between 100-110 degrees F. Too cold and the yeast won’t activate. Too hot and it’ll die before it even gets started. A quick check with a kitchen thermometer saves a lot of heartache.
Room temperature egg whites are also non-negotiable. Cold eggs straight from the fridge don’t incorporate as well, and that affects the final rise and texture of your healthy gluten free bread.
Flour Blend Troubleshooting
If your loaf comes out dense or gummy, the flour blend is usually the culprit. Stick with Pillsbury gluten-free for best results with this particular recipe. Results with other brands can vary quite a bit.
Also double-check that you’re using instant (rapid rise) yeast, not active dry yeast. They behave differently and active dry yeast requires a separate proofing step that this recipe doesn’t account for.
Fun Variations to Try
Want to mix things up? Add a tablespoon of rosemary and a pinch of garlic powder for a savory herb loaf. It’s incredible toasted with olive oil alongside a bowl of homemade ramen broth.
You can also swap the honey for maple syrup to make it fully vegan. It won’t change the texture noticeably, and the subtle maple flavor is a lovely touch in the finished loaf.
For a slightly sweeter sandwich bread, increase the honey to 1/3 cup. It pairs beautifully with chicken fillings like this chicken caesar protein wrap recipe, just deconstructed into bread and filling.
Storage, Reheating, and No-Waste Tips
This soft gluten free bread stores really well if you handle it right. The key is keeping it airtight and not pre-slicing the whole loaf ahead of time.
| Storage Method | Duration | Tips |
|---|---|---|
| Counter (airtight container) | 2-3 days | Do not pre-slice; slice as needed |
| Freezer | Up to 3 months | Wrap in plastic wrap, then foil, then a freezer bag |
| Refrigerator (thawing) | Overnight | Thaw frozen loaf in the fridge before slicing |
To reheat individual slices, pop them in the toaster for 1-2 minutes. It refreshes the texture beautifully and gives you that lightly crispy crust back. For a full loaf, wrap in foil and warm in a 300 degree F oven for about 10-15 minutes.
Got end pieces nobody wants? Cube them up, toss with olive oil and herbs, and bake at 375 degrees F for 10-12 minutes to make gluten free croutons. They’re amazing on a salad or floating on a bowl of creamy Tuscan chicken.
Nutritional Information
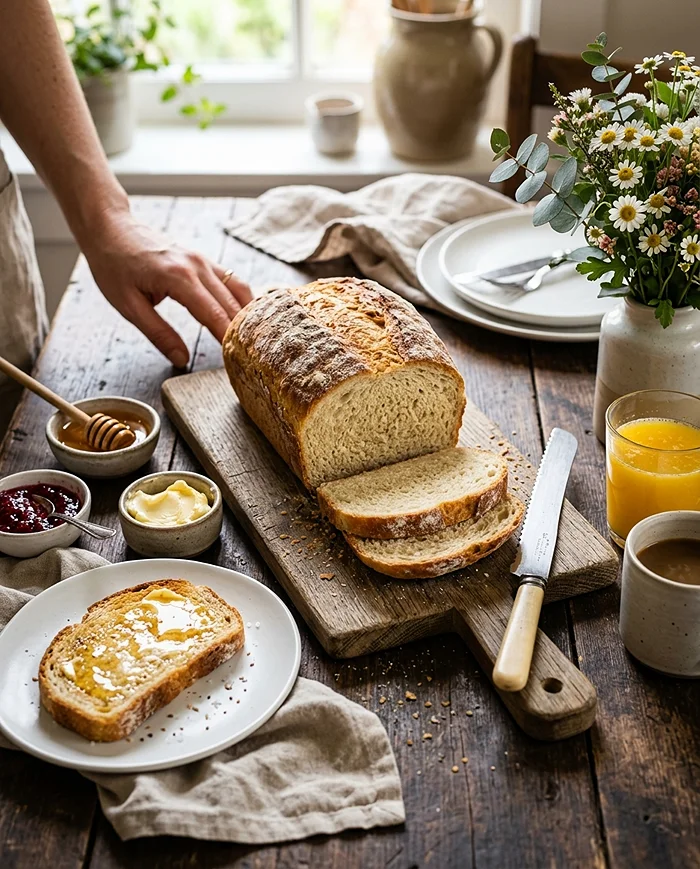
The following estimates are based on 16 servings per loaf. Values may vary slightly depending on the specific flour blend and sweetener used.
| Nutrient | Per Serving (1 slice) |
|---|---|
| Calories | Approx. 130 kcal |
| Carbohydrates | Approx. 22g |
| Protein | Approx. 3g |
| Fat | Approx. 4g |
| Fiber | Approx. 1g |
| Sugar | Approx. 4g |
| Sodium | Approx. 140mg |
This healthy gluten free bread is lower in saturated fat than many store-bought GF options, thanks to the olive oil base. It also skips the gums and fillers that make some commercial loaves feel heavy or artificial.
Pair a couple of slices with something hearty like a sheet pan sausage, peppers, and potatoes dinner and you’ve got a complete, satisfying meal.
Frequently Asked Questions
Can I use active dry yeast instead of instant yeast?
It’s not recommended for this recipe. Instant (rapid rise) yeast is added directly to the dry ingredients without proofing, and that’s how this recipe is structured. Swapping to active dry yeast requires a separate proofing step and will change the timing and texture of your loaf.
Why did my gluten free bread come out gummy?
Gummy bread usually comes down to two things: underbaking or the wrong flour blend. Make sure the internal temperature reaches 205-210 degrees F before pulling it from the oven. Also double-check that your GF flour blend is suitable for yeast baking, since many popular blends are not.
Can I make this gluten free bread recipe dairy-free?
Yes, this recipe is already dairy-free. There’s no butter or milk in the ingredient list. Just make sure your gluten-free flour blend doesn’t contain any dairy-based additives, which some specialty blends do.
Can I freeze this bread?
Absolutely. Once the loaf is completely cooled, wrap it tightly in plastic wrap, then a layer of foil or freezer paper, and seal it in a freezer bag. It keeps well for up to 3 months. Thaw overnight in the refrigerator before slicing.
What can I serve with this soft gluten free bread?
This bread is incredibly versatile. Use it for sandwiches, toast it for breakfast with a smear of almond butter, or serve thick slices alongside a hearty soup or stew. It also works beautifully as the base for a fun no-bake cherry cheesecake toast situation if you’re feeling creative.
Ready to Bake Your New Favorite Loaf?
This gluten free bread recipe is the real deal. Soft, fluffy, golden, and sturdy enough for actual sandwiches. Once you’ve made it, you’ll wonder why you ever settled for the store-bought stuff.
Give it a go this weekend and let me know how it turned out in the comments below. Did you try any variations? A different sweetener? A fun add-in? Tell me everything.
And if your loaf turns out gorgeous (it will), please share a photo on Pinterest and tag it so others in the gluten free community can find this recipe too. You might just save someone else from another disappointing GF bread experience.
While you’re here, don’t miss the American flag fruit pizza for your next celebration. It’s a crowd-pleaser that’s just as easy and way more festive.
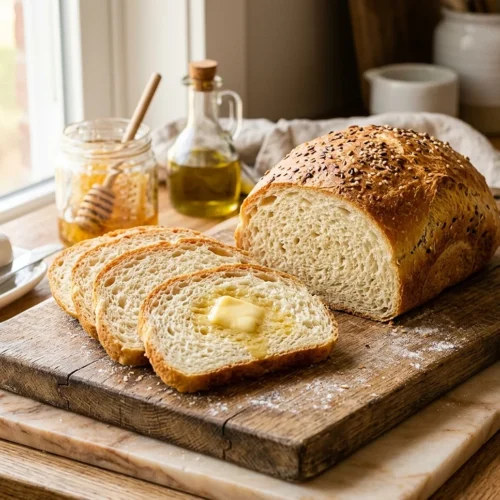
The Most Dreamy Gluten Free Bread Recipe You’ll Actually Want to Eat
Equipment
- 9×5-inch bread pan or 9×4-inch small Pullman loaf pan
- Large mixing bowl
- Stand mixer with paddle attachment (or hand mixer)
- Plastic wrap
- Kitchen Towel
- Wire cooling rack
- Serrated bread knife
- Instant-Read Thermometer
Ingredients
Dry Ingredients
- 2.5 cups all-purpose gluten-free flour Pillsbury gluten-free recommended; not all blends work for yeast baking
- 1 tsp xanthan gum Leave out if your flour blend already contains it
- 1 tsp gluten-free baking powder
- 2.25 tsp rapid rise/instant yeast 1 standard packet; must be instant yeast, not active dry
Wet Ingredients
- 0.25 cup extra virgin olive oil
- 0.25 cup honey Sub agave nectar or maple syrup if preferred
- 1 tsp apple cider vinegar
- 1.5 cups warm water 100-110°F
- 3 egg whites From large eggs, room temperature
Seasoning
- 1 tsp salt
Instructions
- Spray a 9×5-inch bread pan or 9×4-inch small Pullman loaf pan generously with gluten-free cooking spray. Move your oven rack to the middle position, then preheat to 350°F.
- Add the gluten-free flour, baking powder, and instant yeast to a large mixing bowl. Add xanthan gum only if your flour blend does not already contain it. Stir to combine.
- Pour in the olive oil, honey, apple cider vinegar, and warm water. Mix on low speed for about 1 minute until just combined. If using a stand mixer, use the paddle attachment, not the dough hook.
- Add the egg whites and salt to the batter and mix on medium speed for 1 minute. The dough will look like a thick cake batter — that is exactly what you want.
- Pour the batter into your greased loaf pan and smooth the top with a wet spatula. Spray a sheet of plastic wrap with cooking spray, lay it over the top of the pan, then cover with a kitchen towel. Allow the bread to rise in a warm place for 30 minutes.
- Place the pan on the middle oven rack horizontally and bake at 350°F for 30 minutes. The top should be golden brown and the internal temperature should read 205-210°F on an instant-read thermometer.
- Let the loaf cool in the pan for 10 minutes, then transfer it to a wire cooling rack. Do not let it cool completely in the pan or steam will get trapped and make the bottom soggy. Allow the bread to cool completely before slicing.
- Use a serrated bread knife to slice the loaf. A smooth-blade knife will squish the bread and flatten the air pockets inside.