2 Ingredient Protein Bagels
Craving fresh bagels without the two-hour dough saga? These 2 ingredient protein bagels are chewy, golden, and shockingly easy — ready in under 30 minutes with just flour and Greek yogurt. Honestly, once you try them, store-bought bagels will feel like a betrayal.
I stumbled onto this recipe on a rushed Sunday morning when I had zero time and zero desire to leave the house. Two ingredients, one bowl, and suddenly I’m living my best bagel life. It’s become my go-to for easy breakfast meal prep all week long.
Table of Contents
Why You’ll Love These High Protein Bagels
This is the kind of recipe that makes you want to cook everything in sight. Lucky for you, the collection is full of exactly that. Go explore and find your new go-to dish.
These aren’t just convenient — they’re genuinely good. The Greek yogurt gives them a slight tang and a tender chew that feels bakery-worthy. And because you’re using yogurt as the base, each bagel packs a solid protein punch without any fancy powders or supplements.
They’re also endlessly customizable. Plain, seeded, everything-spiced — you name it. If you’re into homemade baked goods that actually taste impressive, these bagels belong in your rotation immediately.
Quick Overview
These 2 ingredient protein bagels deliver soft, slightly chewy bagels with a golden crust. The dough takes about 5 minutes to pull together, and the oven does the rest. No yeast, no rise time, no stress.
They work beautifully for meal prep and stay fresh for days. Think of them as your new weekday breakfast anchor — toast one, top it, and you’re out the door.
Ingredients
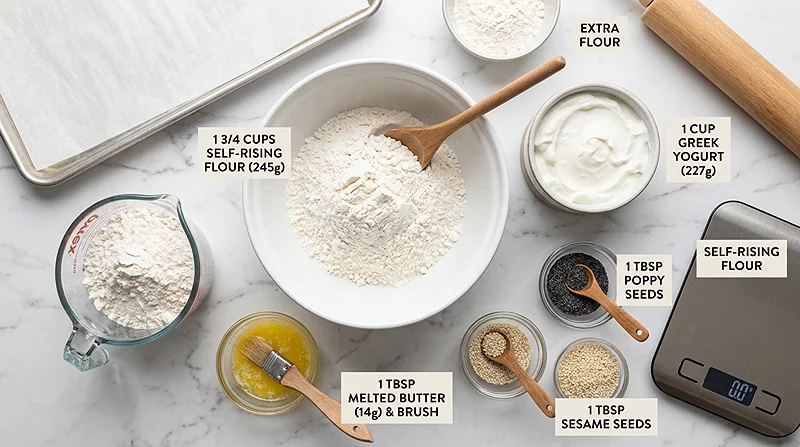
| Category | Ingredient | Amount | Notes |
|---|---|---|---|
| Dough Base | Self-rising flour | 1 3/4 cups | Use gluten-free blend if needed |
| Dough Base | Greek yogurt | 1 cup | Full-fat works best; see notes for tested swaps |
| Topping | Butter of choice | 1 tablespoon | Or use egg, milk, or water to brush tops |
| Topping (Optional) | Sesame seeds | 1 tablespoon | Optional but highly recommended |
| Topping (Optional) | Poppy seeds | 1 tablespoon | Optional, adds a nice nutty finish |
Step-by-Step Instructions
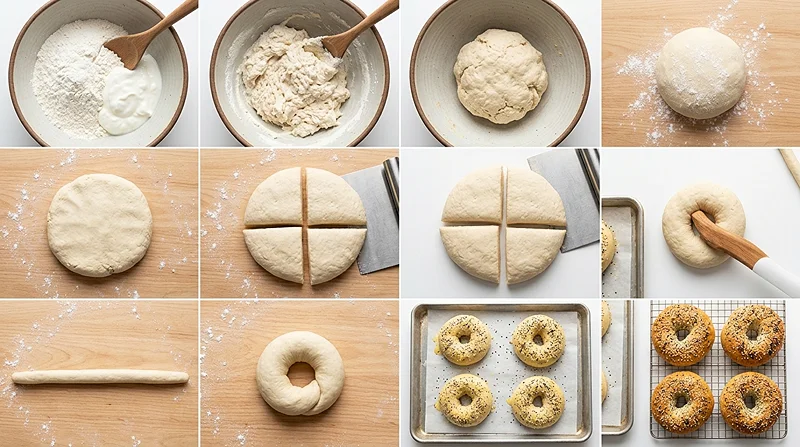
Step 1: Get Your Oven Going
Preheat your oven to 180C / 350F. Line a baking tray with parchment paper and set it aside. Starting with a hot oven means your bagels will hit it ready to go — no waiting around once the dough is shaped.
Step 2: Mix the Dough
In a large mixing bowl, combine your self-rising flour and Greek yogurt. Stir until a shaggy dough forms, then keep going until it comes together into a smooth ball. It might look a little rough at first — just keep mixing and it’ll get there.
“Don’t overthink the dough. If it’s slightly sticky, that’s totally fine. A little extra flour on your hands goes a long way.”
Step 3: Flour Your Surface
Lightly dust a clean kitchen surface with flour. Turn the dough out and dust the top lightly too. This prevents sticking without making the dough dry and stiff — you want it pliable, not a flour brick.
Step 4: Knead and Divide
Gently knead the dough on both sides, flattening it into a rough circular shape. Then slice it into 4 even pieces. You don’t need to be super precise here — eyeballing it works perfectly fine.
Step 5: Shape the Bagels
Roll each piece into a long, thin rope — think sausage shape, about 8–10 inches long. Bring both ends together and pinch firmly to form a ring. Place each bagel onto your lined tray as you go.
If the ends keep pulling apart, wet your fingers slightly and press them together. That little bit of moisture acts like edible glue. It totally works.
Step 6: Brush and Top
Lightly brush the top of each bagel with melted butter, a beaten egg, milk, or even just water. This is what gives them that gorgeous golden-brown top. Sprinkle on your sesame seeds, poppy seeds, or both if you’re feeling fancy.
Step 7: Bake Until Golden
Bake for 20–22 minutes until the tops are golden and the bottoms sound hollow when tapped. Remove from the oven and let them cool completely on the tray before slicing. I know it’s tempting to dig in immediately — but cooling helps the inside finish setting up properly.
Expert Tips for Perfect Cottage Cheese Bagels and Yogurt Variations
Best Yogurt to Use
Full-fat Greek yogurt gives the best texture — creamy, thick, and just clingy enough to hold the dough together. Low-fat versions can work but may make the dough a little stickier. Avoid regular thin yogurt; it adds too much moisture.
Cottage cheese bagels are also a popular swap! Blend your cottage cheese smooth before using it in place of yogurt. The result is slightly denser but still delicious, and the protein content goes even higher.
Gluten-Free Option
Swap the self-rising flour for a 1:1 gluten-free self-rising blend. The texture will be slightly more crumbly, but they still hold together well and taste great toasted. Just be gentle when shaping — gluten-free dough is a bit more delicate.
Flavor Variations
Want to level up? Mix everything bagel seasoning directly into the dough before shaping. You can also fold in dried herbs, garlic powder, or a little shredded cheese. These little additions make each batch feel totally different.
For a sweeter version, add a teaspoon of honey and a pinch of cinnamon to the dough. Top with a sprinkle of sugar before baking. They’re incredible with cream cheese and jam.
Troubleshooting Common Issues
If your dough is too sticky to handle, add flour one tablespoon at a time until it’s manageable. If it feels too dry and keeps cracking, add a teaspoon of yogurt and knead it in slowly. It’s all about feel — the dough should be soft but not wet.
If your bagel rings keep falling apart in the oven, make sure you’re pressing the ends together firmly before baking. A little water on the join really does help seal them.
Storage Instructions
| Storage Method | Container | Duration |
|---|---|---|
| Room Temperature | Airtight bag or container | Up to 2 days |
| Refrigerator | Sealed bag or airtight container | Up to 5 days |
| Freezer | Zip-lock bag, sliced in half | Up to 3 months |
Reheating Tips
The best way to reheat these is straight in the toaster — slice them first and toast from frozen or fridge-cold. They come out crisp on the outside and soft in the middle, just like fresh-baked. A toaster oven at 300F for 5 minutes also works beautifully.
No-Waste Kitchen Ideas
Got a bagel that’s a little stale? Slice it thin and bake at 300F for 10–12 minutes to make bagel chips. Incredible with hummus or alongside a bowl of soup. You can also cube day-old bagels and use them as croutons for salads — zero waste, all flavor.
Leftover Greek yogurt from the recipe? Thin it out and use it as a salad dressing base, or dollop it onto a bowl alongside your next savory meal. It pairs really well with dishes like this Chinese pepper steak with onions for a cooling contrast.
Nutritional Information
| Nutrient | Per Bagel (approx.) |
|---|---|
| Calories | ~220 kcal |
| Protein | ~10g |
| Carbohydrates | ~35g |
| Fat | ~3g |
| Fiber | ~1g |
| Sugar | ~3g |
Nutritional values are estimates based on standard ingredients and will vary depending on the yogurt brand and toppings used.
Easy Breakfast Meal Prep: How to Make These Ahead
These bagels are one of the best easy breakfast meal prep wins I know. Bake a full batch on Sunday, slice and freeze them, and you’ve got grab-and-go breakfasts for the entire week. No morning chaos, no sad desk breakfasts.
Pair them with protein-rich toppings like smoked salmon, avocado, or a fried egg to keep you full until lunch. They also go great alongside lighter weeknight dishes — I love serving them with something like this one-pan honey garlic kielbasa and veggies for a no-fuss dinner.
If you’re into batch cooking, consider making a double batch and stocking your freezer. You’ll thank yourself on every tired Tuesday morning that follows.
Serving Suggestions
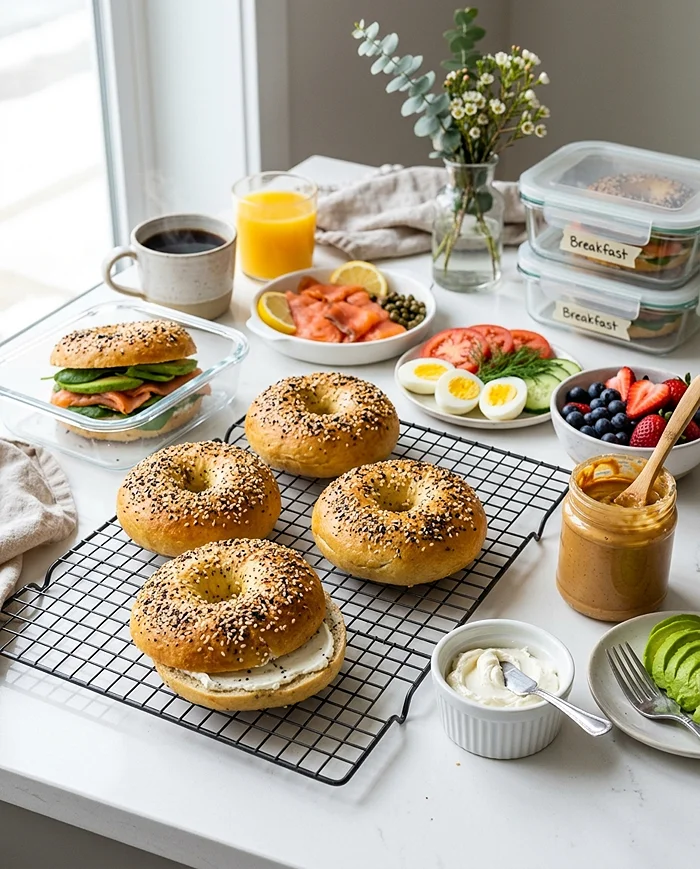
These high protein bagels are a blank canvas for toppings. Go classic with cream cheese and smoked salmon, or keep it simple with butter and a drizzle of honey. They’re also incredible toasted and topped with mashed avocado and a sprinkle of chili flakes.
Want something heartier? Slice one open and load it up like a sandwich. They hold up surprisingly well to fillings. Honestly, even just slathered with butter straight from the oven, they’re pretty hard to beat.
For a fun weekend brunch spread, serve them alongside something a little indulgent like this bacon cheeseburger casserole — a serious crowd-pleaser that takes very little effort to pull together.
Wash it all down with something refreshing. I’ve been loving this tropical butterfly refresher drink on weekend mornings — bright, fruity, and the perfect contrast to a savory bagel spread.
FAQs
Can I use regular yogurt instead of Greek yogurt?
Regular yogurt has a higher water content, which can make the dough too wet and sticky to work with easily. Greek yogurt is thicker and gives the dough the right consistency. If Greek yogurt isn’t available, strain regular yogurt through a cheesecloth for 30 minutes to remove excess liquid before using.
Do these 2 ingredient protein bagels actually taste like real bagels?
They’re not identical to a New York water bagel — let’s be real. But they’re genuinely chewy, slightly tangy, and satisfying in all the right ways. Most people are surprised by how good they are given how simple the recipe is. Toast them and they get even better.
Can I make cottage cheese bagels with this recipe?
Yes, and they’re fantastic! Blend your cottage cheese until completely smooth first, then swap it 1:1 for the Greek yogurt. The dough behaves almost identically, and the protein content is even higher. The flavor is a touch milder, which some people actually prefer.
How do I know when the bagels are done baking?
Look for a deep golden-brown color on top and bottom. You can also tap the bottom of a bagel — it should sound slightly hollow when fully baked. If they’re browning too fast on top but still feel soft inside, tent loosely with foil for the last few minutes.
Can I double the recipe for bigger batch meal prep?
Absolutely — this recipe doubles and triples easily with no issues. The dough mixes quickly, so a larger batch doesn’t take much longer to prep. Bake in batches on separate trays, or freeze extras immediately after cooling for breakfasts throughout the month.
Give These a Try
These 2 ingredient protein bagels are the kind of recipe that makes you feel like a genius in the kitchen. Two ingredients, 30 minutes, and you’ve got fresh homemade bagels that actually deliver on flavor and protein. It genuinely doesn’t get simpler than this.
Make a batch this week and see how fast they disappear. Then come back and tell me how it went — I’d love to hear your toppings of choice and any fun variations you tried.
If you make these, please share them on Pinterest and tag your creations! Your photos might just inspire the next person to ditch the store-bought bagels for good.
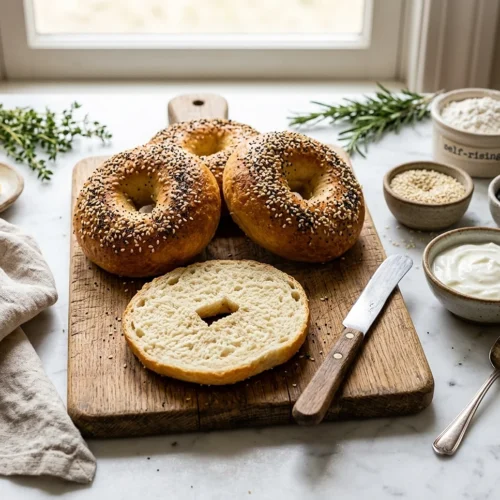
2 Ingredient Protein Bagels
Equipment
- Large mixing bowl
- Baking tray
- Parchment paper
- Pastry brush
Ingredients
Dough
- 1 ¾ cups Self-rising flour Use gluten-free blend if needed
- 1 cup Greek yogurt Full-fat works best; cottage cheese (blended smooth) can be substituted
Toppings
- 1 tablespoon Butter Or substitute with egg, milk, or water to brush tops
- 1 tablespoon Sesame seeds Optional
- 1 tablespoon Poppy seeds Optional
Instructions
- Preheat the oven to 180C / 350F. Line a baking tray with parchment paper and set aside.
- In a large mixing bowl, combine the self-rising flour and Greek yogurt. Mix well until fully combined and a ball of dough forms.
- Lightly dust a clean kitchen surface with extra flour. Place the ball of dough on top and dust lightly with a little more flour.
- Gently knead the dough on both sides, flattening it into a rough circular shape. Slice into 4 even pieces.
- Roll each piece into a long, thin rope about 8–10 inches long. Bring both ends together and pinch firmly to form a bagel ring. Place on the lined tray and repeat for all 4 bagels.
- Lightly brush the top of each bagel with melted butter, beaten egg, milk, or water. Sprinkle sesame seeds, poppy seeds, or both on top.
- Bake for 20–22 minutes, or until the tops are golden brown. Remove from the oven and allow to cool completely before slicing.