Sourdough Discard Biscuits
Don’t toss that starter! These sourdough discard biscuits are the golden, flaky, slightly tangy biscuits you never knew you needed — and they come together faster than you’d think.
I started making these on a whim one Sunday morning when my discard jar was overflowing. One bite in, and I swear I almost cried. That’s how good they are.
Table of Contents
What Makes These Sourdough Discard Biscuits So Special
Did you know those beautiful, tangy bubbles from your sourdough starter can do so much more than just bread? If you’re eager to discover a whole world of irresistible sourdough recipes, from sweet treats to savory delights, be sure to explore our complete collection!
These aren’t your average biscuits. The sourdough discard adds a subtle tang and depth that you just can’t fake with regular baking. They’re buttery, layered, and golden on the outside with a soft, pillowy middle.
They’re also one of the best discard baking ideas out there because they use pantry staples you already have. No special equipment. No overnight ferment. Just biscuit magic.
Ingredients You’ll Need
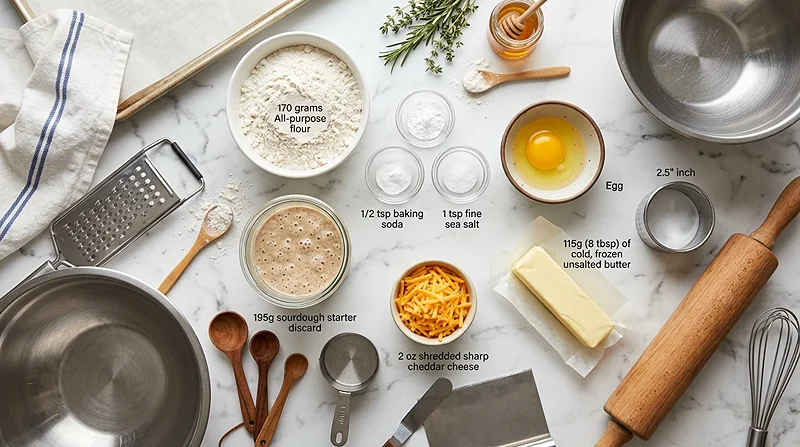
Here’s everything laid out nice and simple. The frozen butter is non-negotiable — don’t skip that step!
| Category | Ingredient | Amount |
|---|---|---|
| Wet | Sourdough starter discard | 195 grams |
| Wet | Large egg | 1 |
| Dry | All-purpose flour | 170 grams |
| Dry | Baking powder | 2 teaspoons |
| Dry | Fine sea salt | 3/4 teaspoon |
| Fat | Unsalted frozen butter | 115 grams (8 tablespoons) |
| Optional | Shredded cheese | 2 ounces |
Quick Recipe Overview
This easy biscuit recipe yields 5 generously sized biscuits. They bake up golden and flaky, with crisp edges and a tender, pull-apart center.
The sourdough discard does double duty here: it adds moisture, a subtle tang, and helps the biscuits rise beautifully alongside the baking powder. These are quick sourdough biscuits in the best possible way.
Optional cheese on top makes them absolutely showstopping. Pair them alongside sheet pan sausage and peppers for a full, comforting meal.
How to Make Sourdough Discard Biscuits Step by Step
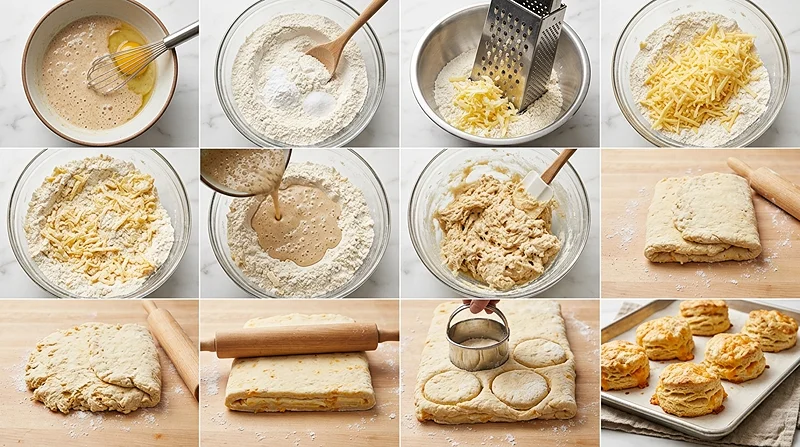
Step 1: Mix Your Wet Ingredients
Grab a bowl and whisk together your sourdough starter discard and the egg until combined. It’ll look a little thick and bubbly — that’s exactly what you want.
Set this aside while you work on the dry ingredients. It only takes 30 seconds but it’s an important step!
Step 2: Combine the Dry Ingredients
In a separate bowl, stir together the flour, baking powder, and salt. Give it a good mix so the baking powder is evenly distributed. No lumps, no drama.
Step 3: Grate That Frozen Butter
This is the trick that makes these quick sourdough biscuits turn out beautifully flaky every time. Use the large-hole side of your box grater and grate the frozen butter straight into the flour.
Scrape every last bit from inside the grater — that butter is precious! Then gently toss the shredded butter in the flour so each piece gets a light coating.
“Cold butter = flaky layers. This step is everything. Don’t let it soften.”
If you’re adding cheese, toss it in now and give everything a gentle stir to combine.
Step 4: Bring the Dough Together
Make a well in the center of your flour-butter mixture. Pour in the discard-egg mixture and stir with a spatula until just combined. A few dry spots are fine — you don’t want to overmix.
The dough will look pretty shaggy and rough. That’s totally normal and a sign you’re on the right track for this easy biscuit recipe!
Step 5: Fold for Flaky Layers
Turn the dough out onto a clean counter. Knead it gently for about 10 seconds — just enough to bring it together. Then use a rolling pin to roll it to about 1/2 inch thick.
Now for the fun part: fold one-third of the dough up and over the middle, then fold the other third on top — like folding a letter. Fold up the short ends to make a rough square.
Roll that square back out to about 3/4 inch thick. Thicker is better here! Thin biscuits are sad biscuits. These layers are what make your sourdough discard biscuits extra flaky and gorgeous.
Need a visual? Check the notes section of this recipe — there’s a video walkthrough of the folding step that makes everything click.
Step 6: Cut Your Biscuits
Dip your biscuit cutter in flour, press straight down, and pull straight back up. Do not twist. Twisting seals the edges and you’ll lose those beautiful flaky layers we just worked so hard to build.
Gather the scraps, press them gently back together, and cut one or two more biscuits from what’s left.
Step 7: Freeze, Then Bake
Place the biscuits on a parchment-lined baking sheet and pop them in the freezer while your oven preheats to 450 degrees F. This quick chill keeps the butter cold and helps them rise tall.
When the oven is ready, sprinkle a little extra shredded cheese on top of each biscuit if you’re using it. Bake on the middle rack for 18 to 22 minutes, until they’re deeply golden and gorgeous.
Let them cool on a wire rack for a few minutes, then enjoy them the same day. Fresh biscuits are the best biscuits — no debate.
Expert Tips for Perfect Sourdough Discard Biscuits
Keep Everything Cold
Cold butter is the single most important factor in flaky biscuits. If your kitchen is warm, pop the grated butter back in the freezer for 5 minutes before mixing it in. Your future self will thank you.
Don’t Overwork the Dough
Gentle hands make tender biscuits. The more you work the dough, the tougher your biscuits will get. Stir until just combined, knead just enough to hold together, and stop.
Use a Sharp Cutter
A dull biscuit cutter compresses the edges just like twisting does. If you don’t have a biscuit cutter, a sharp-rimmed glass dipped in flour works perfectly for this easy biscuit recipe.
Thicker Is Better
Rolling to 3/4 inch might feel like a lot, but biscuits spread out as they bake. Thin biscuits end up flat and dense. Go thick, bake tall, be happy.
Variations and Fun Twists
Cheesy Sourdough Discard Biscuits
Already built into the recipe — but don’t stop at plain shredded cheddar. Try Gruyere, sharp white cheddar, or a mix of parmesan and mozzarella. The cheese on top gets bubbly and crisp. Absolutely worth it.
Herb Biscuits
Add a tablespoon of fresh chopped chives, rosemary, or thyme to the flour mixture. These pair so well with soups, stews, or alongside a bowl of homemade pesto pasta.
Garlic Butter Biscuits
Brush with garlic butter the moment they come out of the oven. Add a sprinkle of flaky sea salt on top. You’ll get requests to make these every single weekend.
Sweet Biscuits
Reduce the salt to 1/4 teaspoon, skip the cheese, and add a tablespoon of sugar. Serve with jam or honey for a breakfast treat. Try them next to a slice of classic Southern chess pie — total brunch perfection.
Storage Instructions
| Storage Method | How Long | Tips |
|---|---|---|
| Room temperature | 1 day | Wrap loosely in a clean kitchen towel |
| Refrigerator | 3 days | Store in an airtight container |
| Freezer (baked) | Up to 2 months | Wrap individually, reheat from frozen |
| Freezer (unbaked) | Up to 1 month | Freeze on tray first, then bag; bake from frozen |
Reheating Tips
Reheat biscuits in a 350 degree F oven for 8 to 10 minutes, or until warmed through. The oven brings back that crisp exterior way better than the microwave ever will.
Microwave in a pinch? Wrap in a damp paper towel and heat in 20-second bursts. It won’t be quite the same, but it’ll do on a busy morning.
No-Waste Kitchen Ideas
Leftover biscuits make incredible breakfast sandwiches — just slice and fill with eggs, cheese, and hot sauce. Day-old biscuits can also be crumbled and used as a topping for savory casseroles.
You can also split and toast them in a skillet with a little butter. Crispy, golden, and perfect. Pair with creamy garlic pesto gnocchi for a dinner that feels totally indulgent.
Troubleshooting Common Biscuit Problems
My Biscuits Didn’t Rise
Check your baking powder — it might be old. To test it, drop a teaspoon in hot water. If it bubbles like crazy, it’s good. If not, it’s time for a new can.
Also make sure your oven is fully preheated to 450 F before the biscuits go in. That high heat blast is what makes them spring up fast.
My Biscuits Are Dense
Dense biscuits usually mean the dough was overworked or the butter warmed up too much. Next time, work quickly and keep everything as cold as possible.
My Biscuits Spread Flat
If they spread instead of rising, the butter melted before baking. The freezer rest before baking is your best friend here — don’t skip it!
Nutritional Information
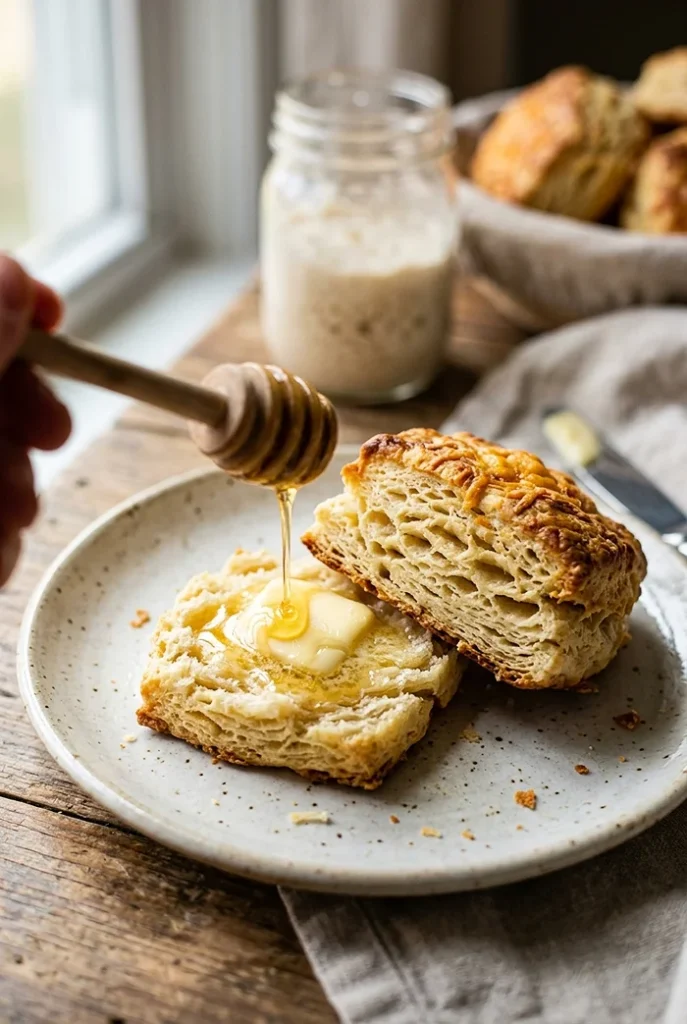
Based on 1 biscuit (without optional cheese). Values are approximate.
| Nutrient | Per Biscuit |
|---|---|
| Calories | ~310 kcal |
| Total Fat | ~20g |
| Saturated Fat | ~12g |
| Carbohydrates | ~26g |
| Protein | ~6g |
| Sodium | ~380mg |
| Fiber | ~1g |
Frequently Asked Questions
Can I use active sourdough starter instead of discard?
Yes, you can! Active starter works just as well in this recipe. Discard is preferred since this is a great way to use it up, but there’s no harm in using your bubbly, fed starter if that’s what you have on hand.
Do I have to use frozen butter?
Technically no, but it makes a huge difference. Cold butter creates steam pockets as it melts in the oven, and those pockets are what gives you those incredible flaky layers. At minimum, use very cold butter straight from the fridge.
Can I make these sourdough discard biscuits ahead of time?
Absolutely! Cut the biscuits, place them on a parchment-lined tray, and freeze solid. Then transfer to a zip bag and store for up to a month. Bake from frozen at 450 F — just add 3 to 5 extra minutes to the bake time.
What can I serve with these biscuits?
So many things! Serve them with eggs and sausage for breakfast, alongside strawberry crumb bars for a brunch spread, or use them to soak up the sauce from a cozy dinner. They’re incredibly versatile.
My discard has been in the fridge for weeks — can I still use it?
Generally yes, as long as it doesn’t smell off (beyond the normal sour tang) and has no signs of mold. Discard keeps well in the fridge for a few weeks. Give it a sniff — if it smells pleasant and sour, it’s good to go for these quick sourdough biscuits.
Ready to Bake?
These sourdough discard biscuits are truly one of the best things to come out of keeping a sourdough starter. They’re easy, fast, incredibly flaky, and way more impressive than they have any right to be for the effort involved.
Give them a try this weekend and let me know how they turn out! Leave a comment below with your favorite variation, and if you loved them, save this recipe to Pinterest so your friends can find it too.
Happy baking — go make something delicious!

Sourdough Discard Biscuits
Equipment
- Box grater
- Mixing bowls
- Spatula
- Rolling pin
- Biscuit cutter
- Bench scraper
- Parchment-lined baking sheet
- Wire rack
Ingredients
Wet Ingredients
- 195 grams sourdough starter discard
- 1 large egg
Dry Ingredients
- 170 grams all-purpose flour
- 2 teaspoons baking powder
- ¾ teaspoon fine sea salt
Fat
- 115 grams unsalted butter frozen (8 tablespoons)
Optional
- 2 ounces shredded cheese optional, plus extra for topping
Instructions
- Whisk together the sourdough starter discard and the egg in a bowl until combined. Set aside while you prepare the dry ingredients.
- In a separate bowl, stir together the flour, baking powder, and salt until evenly combined.
- Use the large-hole side of a box grater to grate the frozen butter directly into the flour mixture. Scrape and use all the butter from inside the grater. Gently toss the grated butter in the flour so each piece gets a light coating. Add the shredded cheese if using, and toss to combine.
- Make a well in the center of the flour-butter mixture. Pour in the discard-egg mixture and stir with a spatula until just combined, until only a few dry spots remain. The dough will be very shaggy — that is normal.
- Turn the dough out onto a clean counter and knead gently for 10 seconds to bring it together — do not overwork it. Use a rolling pin to roll the dough to about 1/2 inch thickness. Fold one-third of the dough up and over to the middle (like a letter), then fold the other third on top. Fold up the short edges to form a rough square. Roll the square back out to 3/4 inch thickness. Thicker is better than too thin.
- Dip a biscuit cutter in flour and press straight down into the dough, then pull straight back up. Do not twist — twisting seals the edges and prevents flaky layers from forming.
- Gather the remaining dough scraps, press gently back together, and cut one or two more biscuits. Place all biscuits on a parchment-lined baking sheet. Transfer to the freezer while the oven preheats to 450 degrees F.
- When the oven is ready, sprinkle a little extra shredded cheese on top of each biscuit if using. Bake on the middle rack for 18 to 22 minutes, or until deeply golden brown. Remove from the oven and let cool on a wire rack. Best enjoyed the same day they are baked.