Sushi Rice Recipe
Master the best Sushi Rice Recipe right in your own kitchen — perfectly seasoned, sticky, and glossy every single time. Whether you’re rolling maki, building a poke bowl, or just eating it by the spoonful (no judgment), this is the foundation that makes all the difference.
I still remember the first time I made homemade sushi rice and it actually came out right. I did a little happy dance in my kitchen. It’s that satisfying.
Table of Contents
Why This Is the Best Sushi Rice Recipe
Now that you’ve mastered the art of perfect sushi rice, get ready to transform your kitchen into a haven of Japanese-inspired delights! This foundational recipe opens up a world of possibilities, from vibrant main courses to delightful snacks – explore all our sushi bowls and rice snack ideas for endless culinary inspiration.
Japanese sushi rice isn’t just plain cooked rice with a splash of vinegar. It’s a carefully balanced blend of sweet, tangy, and savory that makes every bite pop. Get it right, and everything else on your plate tastes better.
This recipe keeps things simple with pantry staples — no fancy equipment needed. You’ll get restaurant-quality seasoned sushi rice in about 30 minutes flat.
Quick Overview
This homemade sushi rice delivers that signature sticky, glossy texture with a perfectly balanced sweet and tangy seasoning. It’s the base for sushi rolls, bowls, and so much more.
The vinegar mixture soaks right into the warm rice, giving every grain a beautiful sheen and that unmistakable Japanese sushi rice flavor. It’s versatile, beginner-friendly, and wildly satisfying to make.
Ingredients
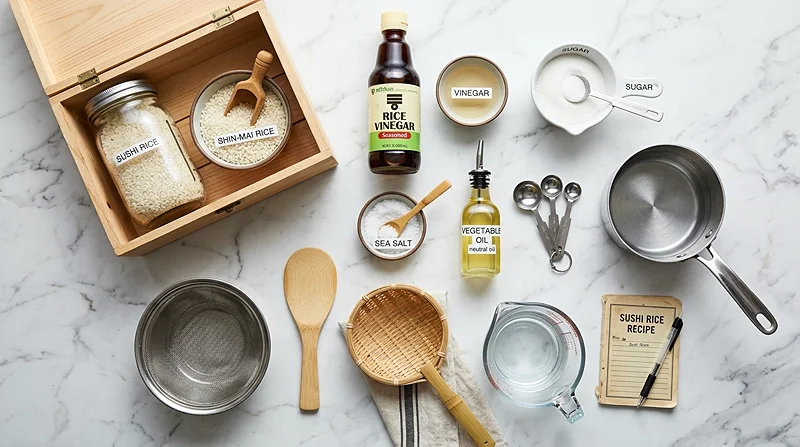
Here’s everything you need for this seasoned sushi rice. It’s a short, fuss-free list — which honestly makes it even better.
| Category | Ingredient | Amount |
|---|---|---|
| Rice Base | Uncooked sushi rice | 2 cups |
| Rice Base | Water | 2 cups |
| Seasoning | Rice wine vinegar (or to taste) | 1/4 cup |
| Seasoning | White sugar (or to taste) | 1/4 cup |
| Seasoning | Vegetable oil | 1 tablespoon |
| Seasoning | Salt (or to taste) | 1 teaspoon |
Pro tip: Always use short-grain Japanese sushi rice — it’s higher in starch and gives you that essential sticky texture. Long-grain rice just won’t behave the same way.
Step-by-Step Instructions
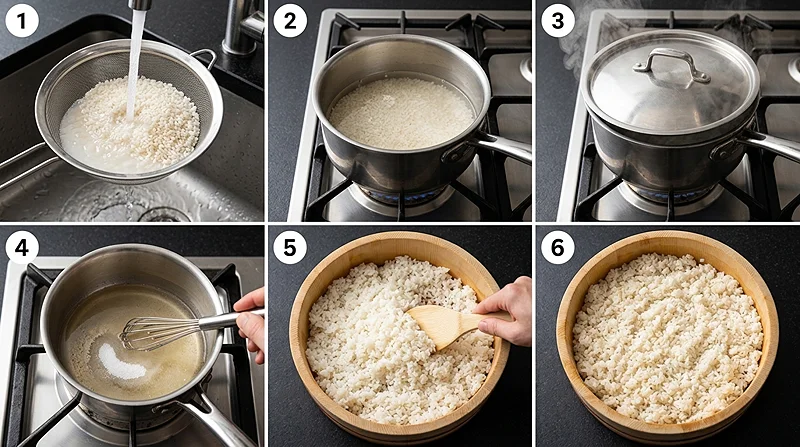
Step 1: Gather Your Ingredients
Before you do anything else, get everything out and measured. It sounds basic, but having your vinegar mixture ready to go the moment the rice is done makes a real difference in the final texture.
Step 2: Rinse the Rice
Rinse your sushi rice under cold water in a fine-mesh strainer until the water runs completely clear. This usually takes 2–3 minutes of swishing and draining.
Don’t skip this step. Rinsing removes excess surface starch that would otherwise make your rice gummy instead of perfectly sticky. Think of it as the secret handshake of homemade sushi rice.
Step 3: Cook the Rice
Combine the rinsed rice and 2 cups of water in a medium saucepan over medium-high heat. Bring it to a boil, then reduce the heat to low, cover tightly, and let it cook for 12 minutes.
Once the 12 minutes are up, remove the pan from heat but keep the lid on for another 10 minutes. The rice will continue steaming — this is what gives it that soft, fluffy interior. After that, remove the lid and let it cool slightly.
“Resist the urge to peek. Every time you lift the lid, you release steam and risk unevenly cooked rice.”
Step 4: Make the Seasoning Mixture
While the rice cooks, combine the rice wine vinegar, white sugar, vegetable oil, and salt in a small saucepan over medium heat. Stir gently and cook just until the sugar dissolves — it only takes a couple of minutes. Then take it off the heat and let it cool.
The oil might seem like an odd ingredient, but it adds a subtle richness and helps the seasoning coat every grain evenly. It’s a small touch that makes a noticeable difference in your Japanese sushi rice.
Step 5: Season the Rice
Slowly drizzle the cooled vinegar mixture over the warm rice and fold it in gently using a wooden spoon or rice paddle. Use a cutting motion rather than stirring in circles — you want to coat the grains, not mash them.
It’ll look a little wet and glossy at first. Don’t panic! Keep folding and fanning the rice as it cools, and it’ll dry out beautifully into that perfect seasoned sushi rice texture.
Step 6: Cool and Enjoy
Spread the rice on a wide, flat surface like a sheet pan or large bowl and let it cool to room temperature before using it for rolls, bowls, or nigiri. If you’re in a hurry, a hand fan works wonders.
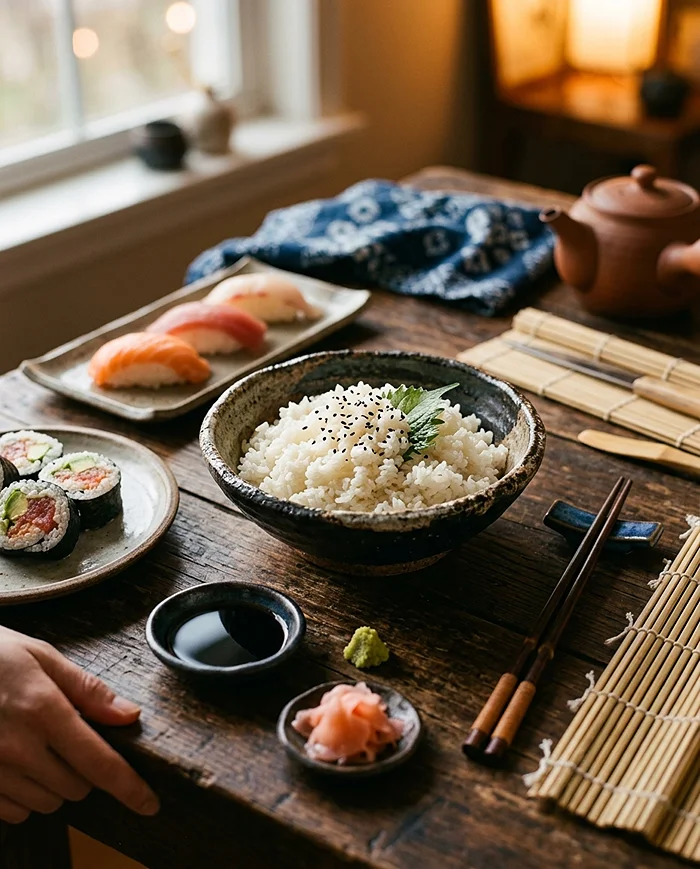
Now it’s ready to go. Use it for sushi rolls, pile it into loaded rice bowls packed with toppings, or eat it plain — honestly, it’s that good.
Expert Tips for Perfect Homemade Sushi Rice
Use the Right Rice
Only short-grain Japanese sushi rice will give you the correct sticky texture. Brands like Koshihikari or Calrose are great choices and easy to find at most grocery stores. Avoid instant or long-grain varieties entirely.
Adjust the Seasoning to Taste
The recipe calls for 1/4 cup each of vinegar and sugar, which gives a well-balanced result. But feel free to tweak it — more vinegar for tang, less sugar for a more savory profile. Taste as you go.
Don’t Use a Metal Bowl
When mixing in the seasoning, use a wooden bowl or a glass bowl if you have one. Metal can react with the vinegar and leave a slight metallic taste in your rice. It’s a small thing, but you’ll notice it.
Keep It Covered Until You Need It
If you’re not using the rice immediately, cover it with a damp kitchen towel. This prevents the surface from drying out and keeps it soft and pliable for rolling.
Variations to Try
Brown Sushi Rice
Want more fiber? Swap in short-grain brown rice. Keep in mind it needs more water and a longer cook time — usually around 45 minutes. The texture is slightly chewier, but it still absorbs the seasoning beautifully.
Less Sugar Option
If you prefer a more savory seasoned sushi rice, cut the sugar down to 1–2 tablespoons. This works especially well if you’re pairing the rice with bold toppings like spicy tuna or avocado.
Seasoned Rice Bowls
This rice isn’t just for sushi rolls. Use it as a base for protein-packed bowls — it pairs brilliantly with grilled chicken, seared salmon, or edamame. Think of how well it’d work alongside high-protein burger bowls for a fusion twist.
Troubleshooting
Rice Is Too Sticky or Clumpy
This usually means you didn’t rinse enough. Make sure you rinse until the water runs completely clear next time. Also, avoid pressing or squishing the rice when mixing in the seasoning.
Rice Is Too Dry
You may have cooked it with too little water, or let it cool uncovered for too long. Make sure you’re keeping it covered with a damp towel if you’re not using it right away.
Seasoning Tastes Too Strong
Reduce the vinegar slightly and add a pinch more salt to balance it out. Every brand of rice wine vinegar varies a little in acidity, so it’s worth tasting and adjusting before pouring the whole batch in.
Storage Instructions
| Storage Method | Container | Duration |
|---|---|---|
| Room Temperature | Covered with damp towel | Up to 4 hours |
| Refrigerator | Airtight container | Up to 3 days |
| Freezer | Freezer-safe bag or container | Up to 1 month |
Reheating Tips
To reheat refrigerated sushi rice, sprinkle a teaspoon of water over it and microwave in 30-second bursts, covered with a damp paper towel. This brings back the moisture without making it mushy.
Frozen rice can go straight from the freezer to the microwave. Cover it, add a splash of water, and heat in 1-minute intervals until warm and soft.
No-Waste Kitchen Ideas
Leftover seasoned sushi rice is a gift. Use it to make crispy rice cakes by pan-frying tablespoon-sized patties in a little oil until golden. Top them with avocado, a drizzle of soy sauce, and a sprinkle of sesame seeds.
You can also mix leftover rice into a simple fried rice. The seasoning already built into it adds a lovely depth of flavor that plain rice just can’t match.
Nutritional Information
Based on 15 servings per batch.
| Nutrient | Amount Per Serving |
|---|---|
| Calories | Approximately 130 kcal |
| Carbohydrates | 28g |
| Protein | 2g |
| Fat | 1g |
| Sodium | 155mg |
| Sugar | 3g |
Nutritional values are estimates and may vary based on specific ingredients and portion sizes used.
What to Serve With Sushi Rice
Once you’ve nailed the best sushi rice recipe, the serving options are endless. Use it as the base for quick weeknight dinner bowls.
Pair it with bold proteins and fresh toppings — it works just as well with a seared chicken breast as it does with raw fish. If you love meal-prep bowl ideas, check out these high-protein meal ideas with chicken for more inspiration.
For something a little fun and different, try building sushi-style components and pairing them with lighter bites like homemade strawberry ice cream sandwiches for dessert. It’s a great combo for a casual dinner party spread.
Frequently Asked Questions
What kind of rice is best for sushi rice?
Short-grain Japanese rice — sometimes labeled “sushi rice” or “japonica rice” — is the only variety that gives you the right starchy, sticky texture. Brands like Koshihikari and Calrose are widely available and work beautifully for homemade sushi rice.
Can I make sushi rice without a rice cooker?
Absolutely! This best sushi rice recipe is made entirely on the stovetop. All you need is a medium saucepan with a tight-fitting lid. The key is keeping the heat low and resisting the urge to lift the lid during cooking.
How do I keep sushi rice from getting hard in the fridge?
The secret is storing it in an airtight container and bringing it back to room temperature before using it. Cold rice gets firm and loses that soft, pliable texture. A quick microwave warm-up with a splash of water does the trick.
Is seasoned sushi rice the same as regular cooked rice?
Not at all. Regular cooked rice is just rice. Seasoned sushi rice has been folded with a warm mixture of rice wine vinegar, sugar, oil, and salt, which gives it a distinctive sweet-tangy flavor and that beautiful sheen. That seasoning is what makes Japanese sushi rice so unique and addictive.
Can I use this rice for dishes other than sushi?
Yes, and you should! This homemade sushi rice is incredible in grain bowls, alongside grilled proteins, or even as a side dish. If you love hearty bowls, it pairs perfectly with recipes like these easy crockpot chicken recipes for a satisfying weeknight meal.
Share the Love
If you try this best sushi rice recipe, I’d absolutely love to hear how it went! Drop a comment below and let me know what you used it for — sushi rolls, bowls, or straight from the pot with a spoon.
And if it turns out as gorgeous and glossy as it should, save it to your Pinterest boards so your friends can find it too. Happy cooking!
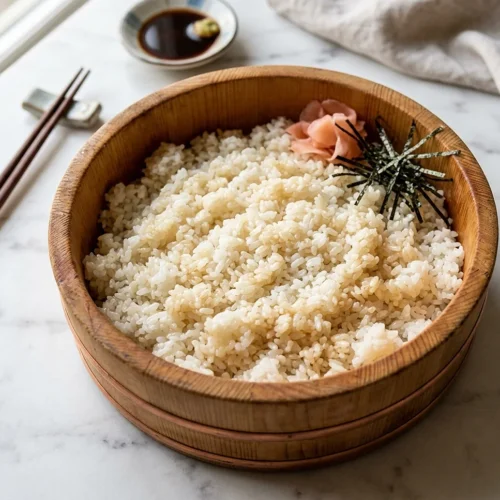
The Best Sushi Rice Recipe You’ll Ever Make at Home
Equipment
- Medium saucepan with lid
- Fine Mesh Strainer
- Small saucepan
- Wooden spoon or rice paddle
- Large bowl or sheet pan
Ingredients
Rice Base
- 2 cups uncooked sushi rice short-grain Japanese rice recommended
- 2 cups water
Seasoning
- ¼ cup rice wine vinegar or to taste
- ¼ cup white sugar or to taste
- 1 tablespoon vegetable oil
- 1 teaspoon salt or to taste
Instructions
- Gather all ingredients and measure them out before you begin. Having your vinegar mixture ready to go the moment the rice is done makes a real difference in the final texture.
- Rinse the sushi rice under cold water in a fine-mesh strainer, swishing and draining until the water runs completely clear. This usually takes 2–3 minutes and removes excess surface starch that would otherwise make the rice gummy.
- Combine the rinsed rice and water in a medium saucepan over medium-high heat. Bring to a boil, then reduce the heat to low, cover tightly, and cook for 12 minutes. Do not lift the lid during cooking.
- Remove the pan from heat and keep the lid on for another 10 minutes. The rice will continue steaming — this is what gives it a soft, fluffy interior. After resting, remove the lid and let the rice cool slightly.
- While the rice cooks, combine the rice wine vinegar, white sugar, vegetable oil, and salt in a small saucepan over medium heat. Stir gently until the sugar fully dissolves, about 2 minutes. Remove from heat and allow to cool.
- Slowly drizzle the cooled vinegar mixture over the warm rice. Fold it in gently using a wooden spoon or rice paddle with a cutting motion — coat the grains without mashing them. The rice may look wet at first; keep folding and it will dry beautifully as it cools.
- Spread the seasoned rice on a wide, flat surface such as a sheet pan or large bowl and let it cool to room temperature before using. Fan it as it cools for best results. Enjoy!