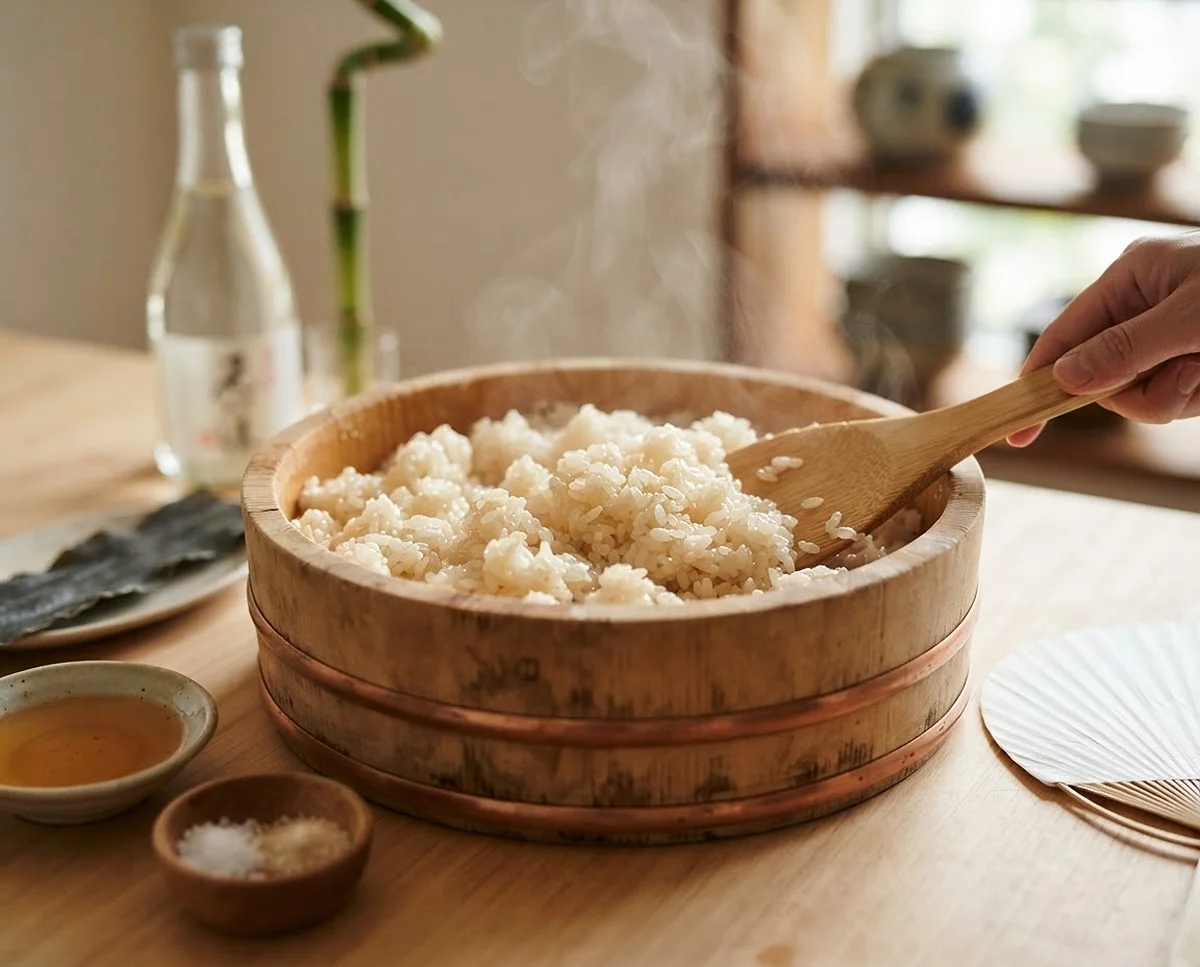
How to Make Perfect Sushi Rice
How to Make Perfect Sushi Rice with this easy Sushi Rice Recipe—sticky, fluffy, lightly seasoned, and perfect for homemade sushi nights.
How to Make Perfect Sushi Rice is way easier than it sounds, promise. This Sushi Rice Recipe gives you that dreamy sticky-but-fluffy texture without turning your pot into rice pudding… which, yes, I’ve absolutely done before.
Once you learn the little tricks, Homemade Sushi Rice becomes one of those cozy kitchen wins you’ll make again and again. A little rinsing, a little seasoning, and boom—you’ve got Seasoned Sushi Rice ready for sushi rolls, bowls, or whatever “I’m basically a sushi chef now” moment you’re having.
Table of Contents
Quick Overview: Why This Recipe Works
This is the recipe for how to make perfect sushi rice without a fancy setup or years of sushi chef training. You just need good rice, patience for the soaking step, and a light hand when you season it.
- Perfectly sticky yet distinct grains, never mushy
- A balanced, tangy-sweet seasoning that doesn’t overpower
- Works on the stovetop or in a rice cooker
- No fancy equipment required, just a sieve and a pot or cooker
If you’re the type who loves a good weeknight dinner shortcut too, you might also like this rotisserie chicken enchilada skillet, which is basically dinner on autopilot.
Ingredients for Seasoned Sushi Rice
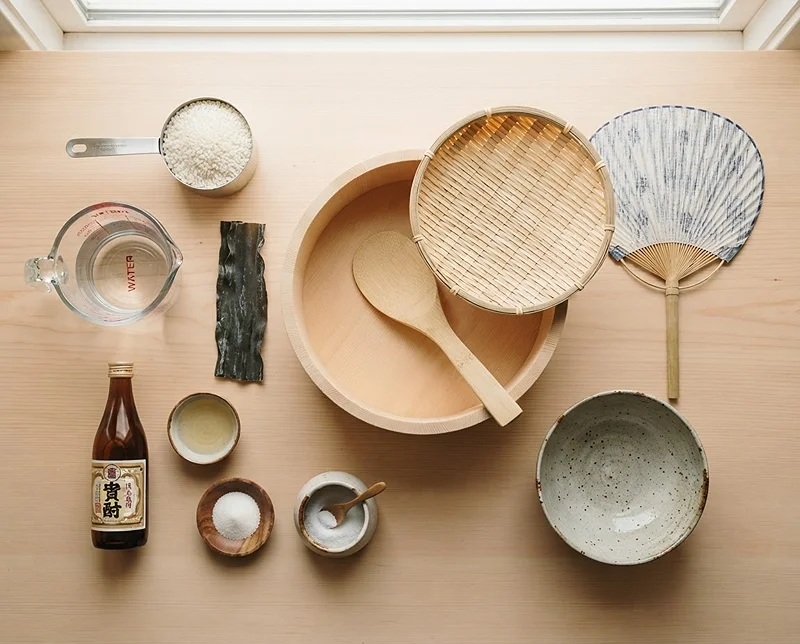
Here’s everything you need for this sushi rice recipe, split into the rice itself and the seasoning that makes it taste like actual sushi rice instead of plain rice.
| Rice | Amount |
|---|---|
| Uncooked Japanese rice (koshihikari works great) | 300 g |
| Cold water | 350 ml |
| Dried kelp (kombu), optional | 5 g |
| Sake, optional | 1 tbsp |
| Seasoning | Amount |
|---|---|
| Unseasoned rice vinegar (komezu) | 2 tbsp |
| Sugar | 1 tbsp |
| Salt | ½ tbsp |
A quick note: the type of rice really matters here. Short-grain Japanese rice is what gives homemade sushi rice that signature sticky texture, so try not to swap it for long-grain varieties if you can help it.
Step-by-Step: How to Make Perfect Sushi Rice
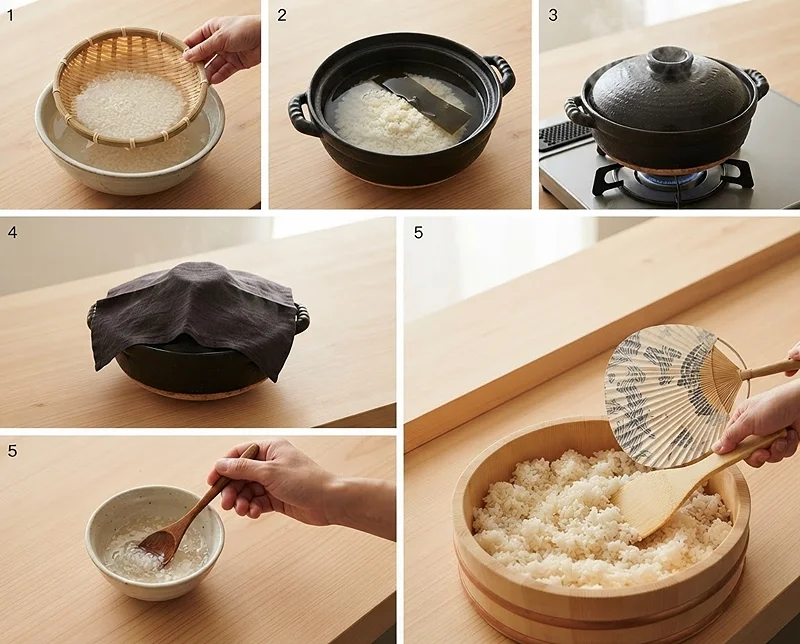
Washing and Soaking the Rice
Pour your 300 g of rice into a sieve set over a big bowl. Fill the bowl with cold water and swish the rice around gently until the water turns cloudy, almost like milk.
Drain it, then repeat two more times, three washes total. Don’t stress about getting the water perfectly clear. A little cloudiness is totally fine and honestly kind of impossible to avoid.
Move the washed rice into your rice cooker or a lidded pot. Add the 350 ml cold water and the kombu if you’re using it, then let it soak for 30 minutes. “If it’s winter, give it a full hour instead,” since cold kitchens slow everything down.
Once soaking is done, stir in the tablespoon of sake if you’re using it. Then either hit start on your rice cooker’s sushi rice setting, or head to the stovetop method below.
Cooking Sushi Rice on the Stove
Set the pot on the stove, lid on, and bring it to a boil over medium heat. Stay nearby and listen for the boil rather than lifting the lid to peek, since letting steam escape messes with the cooking.
Once you hear it boiling, set a timer for 30 seconds. Then drop the heat to medium-low for 2 minutes, followed by low heat for 5 minutes.
After that 5 minutes, crank the heat up to high for just 10 seconds, then turn it off completely. Leave the pot alone, lid on, for 10 more minutes so the rice finishes steaming itself to perfection.
Seasoning Your Sushi Rice Recipe
While the rice steams, whisk together the 2 tbsp rice vinegar, 1 tbsp sugar, and ½ tbsp salt until everything dissolves. This little bowl of tangy goodness is what turns plain rice into real seasoned sushi rice.
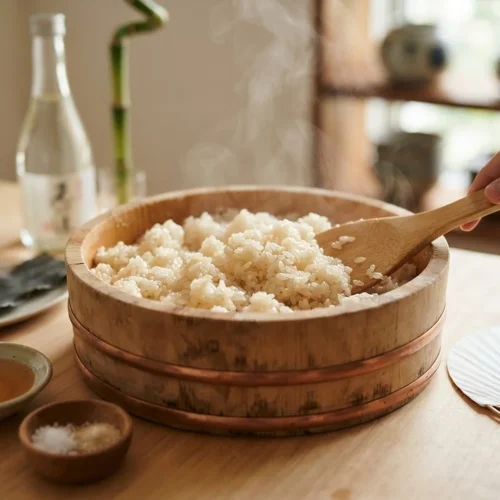
Wet the surface of a wooden sushi oke or any wide, shallow container. A damp surface keeps the rice from sticking as it cools, which saves you a scrubbing headache later.
Once the steaming time is up, gently mix the rice and transfer it into your container. Skip the crispy bottom layer in the pot, it’s tasty but too firm for sushi rolls (great snack for the cook, though).
Pour your vinegar mixture over the rice and fold it in gently with a rice paddle while fanning it, either with an actual fan or a folded piece of cardboard. Spread the rice into a thin, even layer so it cools quickly and evenly.
Use it right away, or drape a damp tea towel over the top to keep it from drying out (best used within 2 hours). Sushi rolls are easiest to roll once the rice cools to around body temperature.
Expert Tips, Variations, and Troubleshooting
Tips for the Best Results
Don’t skip the soaking step, even if you’re in a rush. It’s what lets the grains fully hydrate so they cook evenly instead of ending up chalky in the center.
Fan the rice while mixing in the vinegar. It sounds fussy, but it gives the rice that glossy sheen you see in restaurant sushi rice recipes.
Also, resist the urge to stir the rice like you would pasta. Use a slicing, folding motion with the paddle instead, this keeps the grains intact rather than mashing them into a paste.
If you can, use a wooden bowl or oke rather than metal or plastic. Wood absorbs excess moisture as the rice cools, which helps you avoid that slightly wet, clumpy texture.
Variations to Try
Want a slightly nuttier flavor? A small splash of mirin alongside the sake adds extra depth. You can also swap in brown rice vinegar for a more complex, savory tang in your homemade sushi rice.
For a fun twist, mix in a spoonful of toasted sesame seeds once the rice has cooled slightly. It’s not traditional, but it’s delicious.
Troubleshooting Common Issues
Rice too mushy? You likely added a touch too much water or lifted the lid mid-cook, letting steam escape. Stick to the exact water ratio and resist peeking.
Rice too dry or hard? It probably needed a longer soak, especially in colder weather. Next time, give it that full hour soak mentioned above.
If your seasoned sushi rice tastes flat, your vinegar mixture might need a touch more salt or sugar. Taste as you go and adjust in small amounts.
Rice cooling too slowly? Spread it thinner in the container and use an actual fan if you have one nearby. The faster it cools, the glossier and less sticky the final texture ends up being.
Grains breaking apart or turning mushy while mixing in the seasoning? You’re probably stirring too hard. Switch to that gentle folding motion and give the rice a little grace, it’s more delicate than it looks.
Storage, Reheating, and No-Waste Ideas
| Storage Method | Duration | Notes |
|---|---|---|
| Room temperature | Up to 2 hours | Cover with a damp towel to prevent drying |
| Refrigerator | 1 day | Store in an airtight container |
| Freezer | Not recommended | Texture becomes gummy and grainy once thawed |
To reheat, sprinkle a few drops of water over the rice and microwave it covered in short bursts, fluffing gently between each one. This helps bring back some of that fresh-cooked texture.
Got leftover sushi rice that’s a little past its prime for rolling? Turn it into a quick fried rice, or use it as a base for a rice bowl with whatever veggies and protein you have on hand, nothing goes to waste.
Speaking of not wasting a good dinner idea, if you liked this recipe you might also enjoy this honey garlic chicken couscous skillet for another easy, comforting one-pan meal.
Nutritional Information
| Nutrient | Amount Per Serving |
|---|---|
| Calories | 190 kcal |
| Carbohydrates | 42 g |
| Protein | 3 g |
| Fat | 0.3 g |
| Sugar | 2 g |
| Sodium | 320 mg |
These values are estimates based on a standard serving and can vary depending on the exact rice and seasoning brands you use.
Frequently Asked Questions
What is the best rice to use for a sushi rice recipe?
Short-grain Japanese rice, like koshihikari, works best because it gets sticky enough to hold sushi rolls together while still keeping distinct, tender grains.
Can I make homemade sushi rice without a rice cooker?
Yes! The stovetop method in this recipe works great, you just need to keep an eye on the timing and avoid lifting the lid while it cooks.
Why is my seasoned sushi rice too sticky?
This usually happens if the rice wasn’t washed enough before cooking, since extra starch on the grains makes the rice clump together more than it should.
Can I prepare sushi rice ahead of time?
It’s best enjoyed within a couple of hours of cooking for the ideal texture, but you can refrigerate leftovers for up to a day and gently reheat before using.
Do I have to use kombu or sake in this recipe?
No, both are optional. They add subtle extra flavor, but the rice will still turn out great with just water, vinegar, sugar, and salt.
Conclusion
And that’s it, that’s genuinely how to make perfect sushi rice at home without any special equipment or stress. A little patience with the soaking and cooling steps goes a long way toward that perfect sticky, tangy bite.
If you’re craving more cozy, comforting dinners after this one, check out this chicken tortilla soup recipe or this red lobster biscuit chicken pot pie recipe for your next meal plan.
Give this sushi rice recipe a try this week, snap a photo, and pin it on Pinterest so you can find it again next time the sushi craving hits. I’d love to hear how it turned out for you in the comments!
Perfect Sushi Rice
Equipment
- Sieve
- Rice cooker or pot with lid
- Sushi oke or wide shallow container
- Rice Paddle
- Fan (or piece of cardboard)
Ingredients
Rice
- 300 g uncooked Japanese rice koshihikari recommended
- 350 ml cold water
- 5 g dried kelp (kombu) optional
- 1 tbsp sake optional
Seasoning
- 2 tbsp unseasoned rice vinegar (komezu)
- 1 tbsp sugar
- ½ tbsp salt
Instructions
- Pour 300 g uncooked Japanese rice into a sieve set over a large bowl. Fill the bowl with cold water and swish the rice around until the water becomes cloudy. Drain and repeat two more times (three washes total). The water doesn’t need to be perfectly clear by the end.
- Transfer the rice to a rice cooker or a pot with a lid and add 350 ml cold water and 5 g dried kelp (kombu). Let it soak for 30 minutes (extend to 1 hour in winter).
- Once soaking is done, stir in 1 tbsp sake. Start your rice cooker on the sushi rice setting, or continue with the stovetop method below.
- Stovetop method: Place the pot on the stove with the lid on and bring to a boil over medium heat. Stay close and listen for the boil rather than lifting the lid. Once boiling, set a timer for 30 seconds.
- Lower the heat to medium-low and set a timer for 2 minutes. Then lower the heat again to low and set a timer for 5 minutes.
- After 5 minutes, turn the heat up to the highest setting for 10 seconds, then turn it off. Leave the pot on the stove with the lid on for 10 minutes to finish steaming.
- While the rice steams, mix 1 tbsp sugar and 1/2 tbsp salt with 2 tbsp unseasoned rice vinegar (komezu) until dissolved.
- Wet the surface of a sushi oke or wide container to keep the rice from sticking as it cools.
- Once the 10 minutes of steaming time is up, mix the rice gently and transfer it to the container. Avoid scraping the crispy bottom layer of the pot, since it’s not suitable for sushi.
- Pour the vinegar mixture over the rice and mix gently with a rice paddle while fanning it. Spread the rice into a thin layer to help it cool quickly.
- Use immediately, or cover with a damp tea towel to prevent drying out (use within 2 hours). It’s best to roll sushi once the rice reaches around body temperature.