Deviled Eggs Recipe
Make this classic Deviled Eggs Recipe in under 30 minutes with creamy, tangy filling and a perfect paprika finish. Whether you’re feeding a crowd or prepping a party platter, this is the best deviled eggs recipe you’ll keep coming back to.
Honestly, deviled eggs are one of those foods that disappear off the platter before you even set it down. I made these for a family cookout last summer, turned around for two seconds, and half of them were gone. No apologies were made.
Table of Contents
Why You’ll Love This Deviled Eggs Recipe
Can’t get enough of these flavors? You’re going to love what’s waiting in the lineup. Every single recipe is made to impress without the stress. Happy cooking, friend!
This isn’t just any deviled eggs recipe. It’s the creamy, tangy, perfectly seasoned kind that tastes like your grandma made them — even if your grandma never made deviled eggs a day in her life.
The filling is smooth, rich, and has just the right kick from dijon mustard and pickle relish. It’s a classic Southern deviled eggs vibe with zero fuss.
Plus, you’ve got three ways to hard boil your eggs — stovetop, Instant Pot, or oven — so there’s truly no excuse not to make these.
Ingredients You’ll Need
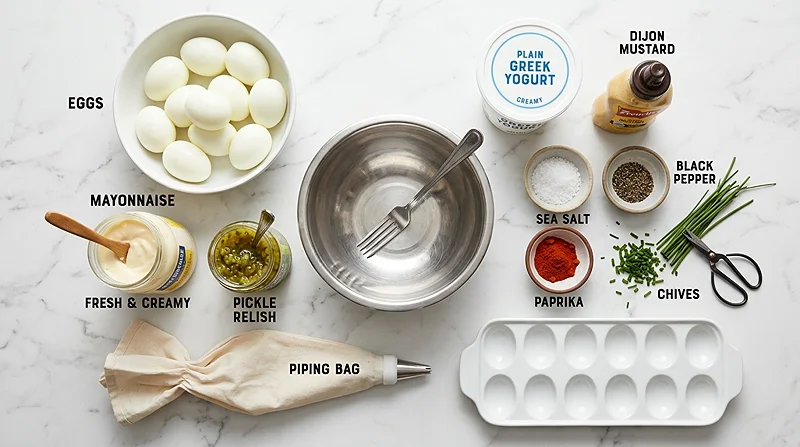
Here’s everything laid out nice and clean. The ingredient list is short, which means every single one matters. Don’t skip the pickle relish — it’s the secret weapon.
| Category | Ingredient | Amount |
|---|---|---|
| Eggs | Large eggs | 12 |
| Filling Base | Mayonnaise (or half mayo, half plain Greek yogurt) | 1/3 cup |
| Filling Base | Pickle relish (or diced dill pickle) | 2 tablespoons |
| Filling Base | Dijon mustard (or yellow mustard) | 1 1/2 teaspoons |
| Seasoning | Salt and freshly ground black pepper | To taste |
| Garnish | Paprika | For topping |
Step-by-Step Instructions
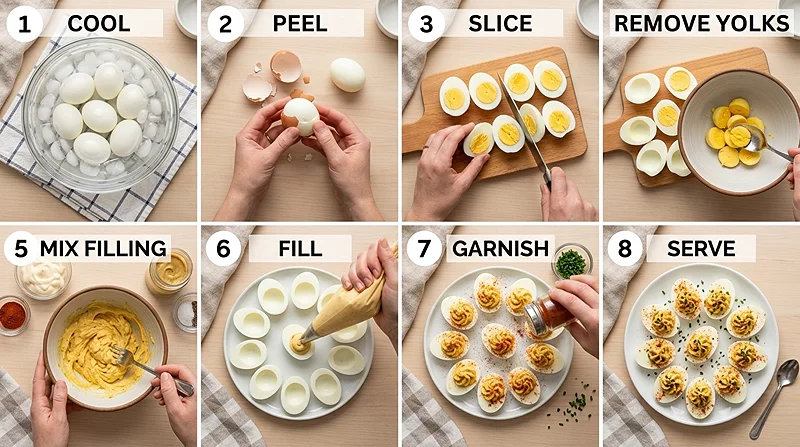
Let’s walk through this together, step by step. It’s genuinely easy, and once you’ve made this best deviled eggs recipe once, you’ll have it memorized forever.
Step 1 — Hard Boil the Eggs (Pick Your Method)
You’ve got three options here. All of them work great, so use whichever fits your kitchen setup.
Stovetop Method: Place eggs in a saucepan and cover with cold water. Bring to a boil, then stir in 1 teaspoon of baking soda — this is a little trick that makes peeling so much easier. Cover, remove from heat, and let sit for 12 minutes.
Instant Pot Method: Add 1 cup of water to the pot. Place the wire rack inside and arrange the eggs on top. Cook on high pressure for 5 minutes, then let it natural release for 5 minutes. Easy as that.
Oven Method: Preheat your oven to 325°F. Nestle each egg into a muffin tin cup and bake for 30 minutes. This one sounds wild, but it genuinely works.
No matter which method you choose, transfer the eggs to an ice water bath immediately after cooking. This stops the cooking process and makes them way easier to peel.
Step 2 — Peel and Prep the Eggs
Once your eggs are cool, peel them gently and slice each one in half lengthwise. Carefully pop the yolks out into a bowl — try to keep the whites intact so you have pretty little cups for your filling.
Pro tip: If your egg whites tear a little, don’t stress. The filling is so good, nobody’s looking at the edges anyway.
Step 3 — Make the Creamy Filling
To the bowl with your yolks, add the mayonnaise, pickle relish, and dijon mustard. Mash it all together with a fork until it’s totally smooth and creamy.
Taste as you go! Add salt and pepper, then adjust the mayo or mustard level to your liking. This is your deviled eggs recipe now — own it.
If you want a slightly lighter version, swapping half the mayo for plain Greek yogurt still gives you that creamy deviled eggs texture without as much richness.
Step 4 — Fill and Garnish
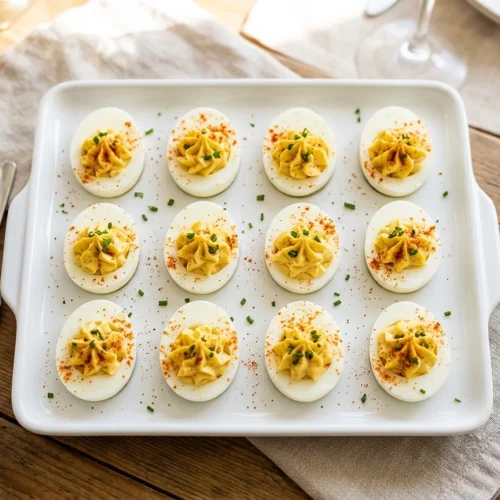
Spoon a generous dollop of filling into each egg white half. You can use a regular spoon for a rustic look, or use a piping bag or zip-lock bag with the corner cut off for something a little fancier.
Dust the tops with paprika right before serving. It adds color, a tiny bit of smokiness, and honestly just makes them look beautiful. Chives work great too if you want a fresh, herby vibe.
Expert Tips for the Best Deviled Eggs
Getting Clean, Easy Peels
The baking soda trick in the stovetop method is genuinely life-changing. It slightly raises the pH of the water, which helps the egg white separate from the shell membrane.
Also, the ice bath is non-negotiable. Cold eggs peel cleaner and faster every single time.
Making the Filling Extra Smooth
If you want ultra-silky creamy deviled eggs, press the yolks through a fine mesh sieve before mixing. It takes an extra two minutes and makes a noticeable difference in texture.
For extra flavor depth, try a tiny splash of apple cider vinegar or a dash of hot sauce in the filling. It won’t taste sharp — just brighter and more interesting.
Variations Worth Trying
Want to go full Southern deviled eggs style? Add a small spoonful of sweet pickle relish instead of dill, and use yellow mustard. That’s the classic church potluck version right there.
For a spicier kick, mix in a little sriracha or top each egg with a slice of pickled jalapeño. These are also great on a charcuterie cup spread if you’re building out a full appetizer table.
Bacon bits, smoked paprika, or even a tiny drizzle of truffle oil on top — honestly, have fun with it. The base filling is your canvas.
Troubleshooting Common Issues
Filling too thick? Add a tiny splash of water or an extra small spoonful of mayo and mix again.
Filling too runny? This usually happens if the yolks are undercooked. Make sure your eggs sat the full 12 minutes off heat. A touch more yolk or a bit less mayo will fix it fast.
Eggs hard to peel? Very fresh eggs are actually harder to peel than eggs that are a few days old. If you can plan ahead, buy your eggs 3–5 days before making this deviled eggs recipe.
Storage and Make-Ahead Tips
These are actually a great make-ahead appetizer. You can boil and peel your eggs a day in advance, store the whites and filling separately in the fridge, then assemble right before serving.
| Storage Method | How Long | Notes |
|---|---|---|
| Refrigerator (assembled) | 2–3 days | Cover tightly with plastic wrap |
| Refrigerator (filling separate) | Up to 3 days | Store filling in an airtight container |
| Freezer | Not recommended | Texture becomes watery after thawing |
Deviled eggs don’t reheat well, but they’re meant to be served cold anyway. Pull them straight from the fridge about 10 minutes before serving for the best flavor.
No-waste tip: Got extra filling? Spread it on toast, use it as a sandwich spread, or stir it into a quick egg salad. It’s basically a ready-made egg salad at that point anyway.
Serving Ideas and Pairings
These shine at potlucks, holidays, and lazy Sunday brunches. They pair perfectly with a classic Martha Stewart-style potato salad for a full spread.
If you’re meal prepping for the week, these alongside some make-ahead breakfast sandwiches keeps your mornings sorted and delicious.
They’re also a crowd-pleasing addition to any snack board. Pair with cheesy zucchini bread for a fun and unexpected combo that guests always love.
Nutritional Information
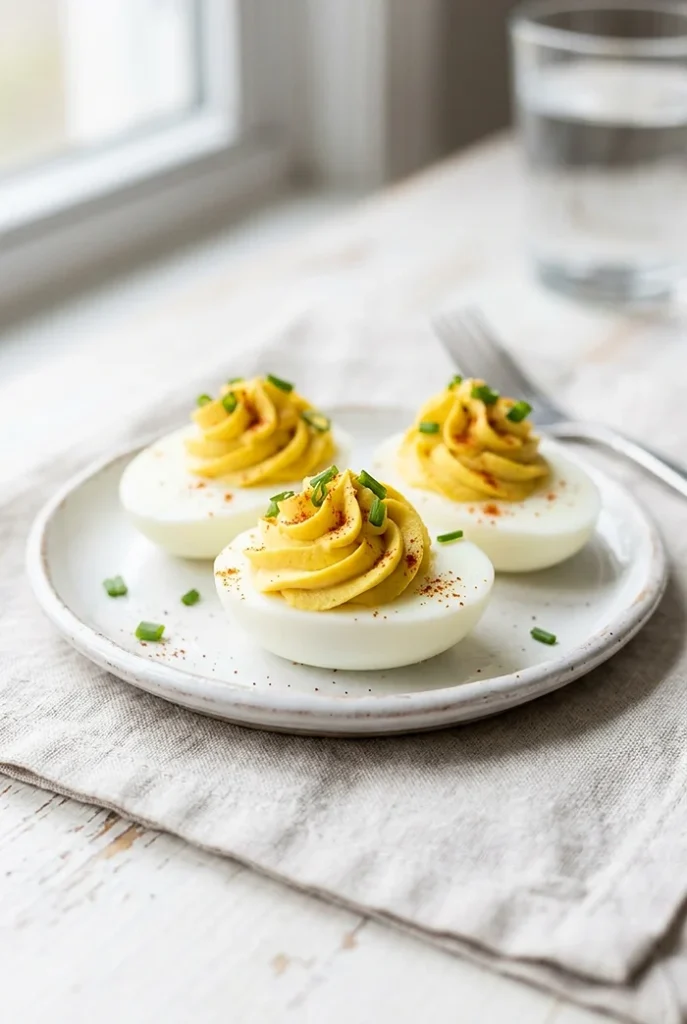
These numbers are approximate per serving (2 deviled egg halves) based on the standard recipe.
| Nutrient | Per Serving (2 halves) |
|---|---|
| Calories | ~120 kcal |
| Protein | ~6g |
| Fat | ~10g |
| Carbohydrates | ~1g |
| Sodium | ~180mg |
Using the Greek yogurt swap for half the mayo reduces the fat slightly and bumps the protein up a touch. It’s a small tweak with a real nutritional difference.
Frequently Asked Questions
Can I make deviled eggs the night before?
Yes, and it’s actually a great idea. Boil and peel the eggs, then store the whites and filling separately in the fridge overnight. Assemble and garnish in the morning. They’ll taste just as fresh.
What’s the difference between Southern deviled eggs and regular ones?
Southern deviled eggs typically use yellow mustard and sweet pickle relish instead of dijon and dill. The flavor is a bit sweeter and more tangy. This recipe works beautifully either way — just swap those two ingredients to go full Southern style.
Why is my deviled egg filling lumpy?
Lumpy filling usually means the yolks weren’t mashed thoroughly enough. Use a fork and really work them until smooth before adding the other ingredients. For the silkiest creamy deviled eggs, press the yolks through a fine mesh sieve first.
How long can deviled eggs sit out at a party?
Deviled eggs should not sit out for more than 2 hours at room temperature, or 1 hour if it’s a hot day. Keep them chilled until serving time, and pop any leftovers back in the fridge promptly.
Can I use Miracle Whip instead of mayo?
You can, but it will change the flavor quite a bit — Miracle Whip is sweeter and tangier than mayo. It’s totally a personal preference thing. If you grew up with Miracle Whip deviled eggs, go for it. Just know the filling will taste noticeably sweeter.
Make This Recipe and Share the Love
That’s really all there is to it. A simple, no-fuss deviled eggs recipe that delivers every single time — creamy filling, perfectly cooked eggs, and that gorgeous paprika finish.
Give these a try at your next get-together and watch them vanish. When they do, save this recipe on Pinterest so you always have it when you need it.
Tried it? Leave a comment below and let me know how yours turned out. Did you go classic, or did you put your own spin on them? I’d love to hear about it.
The Most Irresistible Deviled Eggs Recipe You’ll Ever Make
Equipment
- Saucepan
- Muffin tin
- Instant Pot
- Mixing bowl
- Fork
- Piping bag or zip-lock bag
- Fine-mesh sieve
- Ice water bath bowl
Ingredients
Eggs
- 12 large eggs
Filling
- ⅓ cup mayonnaise or use half mayo and half plain Greek yogurt
- 2 tablespoons pickle relish or diced dill pickle
- 1 ½ teaspoons dijon mustard or yellow mustard
- salt and freshly ground black pepper to taste
Garnish
- paprika for garnish
Instructions
- Stovetop Method: Add eggs to a saucepan and cover with cold water. Bring to a boil, then stir in 1 teaspoon of baking soda — this helps the eggs peel easily. Cover, remove from heat, and let sit for 12 minutes. Transfer eggs to an ice water bath to cool.
- Instant Pot Method: Add 1 cup of water to the Instant Pot. Place the wire rack inside and arrange eggs on top. Cook on high pressure for 5 minutes with a 5-minute natural release. Transfer eggs to an ice water bath for 5 minutes.
- Oven Method: Preheat oven to 325°F. Place each egg in the cup of a standard muffin tin and bake for 30 minutes. Transfer eggs to an ice water bath to cool.
- Peel the cooled eggs and slice each one in half lengthwise. Carefully remove the yolks and place them in a mixing bowl. Try to keep the whites intact so you have clean cups for the filling.
- To the bowl with the yolks, add mayonnaise, pickle relish, and dijon mustard. Mash with a fork until completely smooth. Season with salt and pepper to taste. Adjust mayo, mustard, or seasonings as needed.
- Spoon or pipe the filling back into each egg white half. Garnish with paprika or chives just before serving.