Dot Cake Recipe
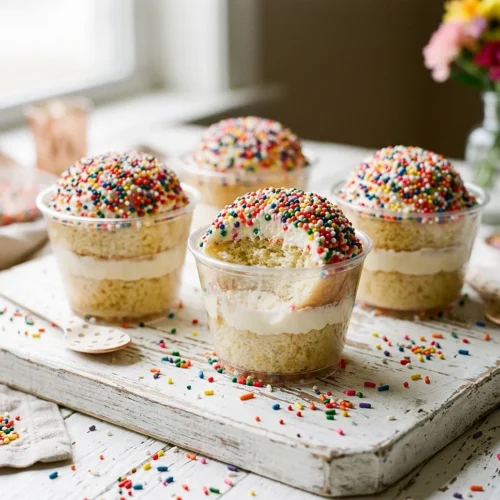
Want to make the most show-stopping dot cake recipe that fits right in an ice cream cup? These little beauties are covered in sprinkles and packed with fluffy vanilla buttercream — and honestly, they’re as fun to make as they are to eat.
I first made these for a kids’ birthday party and watched every single adult sneak one before the kids even noticed. That’s when I knew this recipe was something special.
What Makes This Dot Cake Recipe So Great
This easy dot cake recipe gives you individual, single-serve cakes that are perfectly portioned and absolutely adorable. No slicing, no mess, no fighting over the corner piece.
Each little cake sits snugly in an ice cream cup, gets layered with cloud-like vanilla buttercream, and then gets dunked in a bowl of sprinkles. It’s basically joy in edible form.
The sponge itself is a hot milk cake — rich, tender, and just dense enough to hold its shape when you cut it into rounds. It’s the kind of cake that stays soft for days, which is honestly impressive for something this cute.
Ingredients You’ll Need
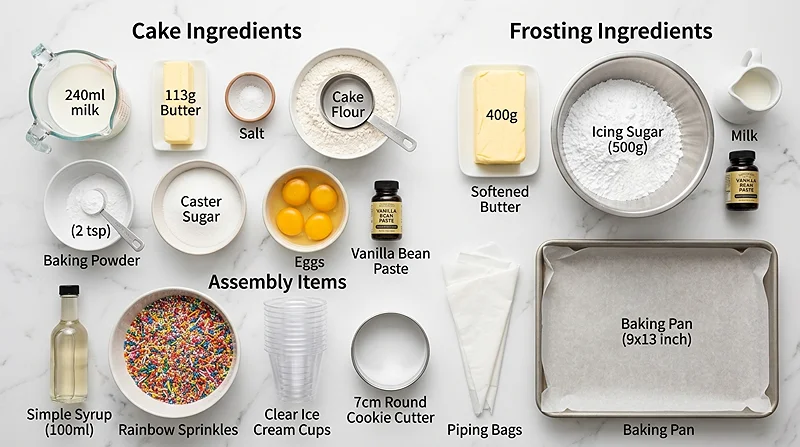
Here’s everything laid out for you. This recipe makes 10 dot cakes, so feel free to scale up if you’re feeding a crowd. Check out these easy lunchbox pinwheels if you need more party food ideas alongside this cake.
For the Cake
| Ingredient | Amount |
|---|---|
| Whole milk | 1 1/4 cups / 310ml / 11 fl oz |
| Butter | 1 stick / 113g |
| Salt | 1 teaspoon |
| Cake flour, sifted | 2 cups / 300g / 10.6 oz |
| Baking powder | 2 teaspoons |
| Caster or superfine sugar | 1 3/4 cups / 385g / 13.6 oz |
| Eggs, room temperature | 4 large |
| Vanilla bean paste | 1 tablespoon |
For the Frosting and Decoration
| Ingredient | Amount |
|---|---|
| Butter, softened (not melted) | 400g / 14 oz |
| Pure icing sugar or icing sugar mixture, sifted | 900g / 2 lbs |
| Milk | 1–2 tablespoons |
| Vanilla bean paste | 1 tablespoon |
To Assemble
| Ingredient | Amount |
|---|---|
| Simple syrup (optional but recommended) | 1/2 cup / 125ml / 4 fl oz |
| Sprinkles | 180g / 6 oz |
| Ice cream cups | 10 |
How to Make This Dot Cake Recipe Step by Step
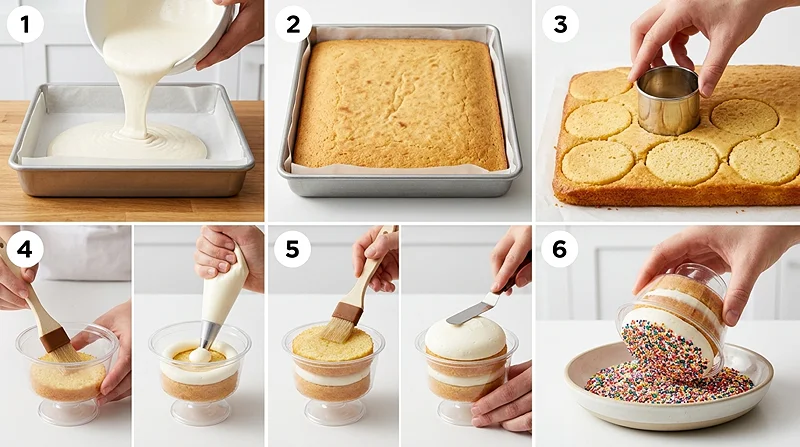
Don’t let the number of steps scare you — this colorful dot cake recipe is actually very beginner-friendly. Each step is short and manageable, and the result is absolutely worth it.
Step 1: Prep Your Pan and Oven
Line a 40x30x5cm (15x12x2 inch) rectangular pan with parchment paper on the base and sides. Preheat your oven to 160C/320F (fan forced) or 180C/350F (conventional).
In a saucepan, heat the milk and butter together until the butter melts. Stir in the salt — you want to just scald the milk, not boil it. Set it aside to cool slightly. Sift your flour and baking powder together into a separate bowl.
Step 2: Beat the Batter
In a stand mixer with the whisk attachment, beat the sugar, eggs, and vanilla bean paste on medium-high for 5 full minutes. You’re looking for a thick, pale, almost white mixture — this is what gives the cake its lift.
Pour in the hot milk mixture and whisk for 15 seconds. Then fold in the flour in two lots on low speed. Don’t overmix — just mix until smooth. The batter will be quite liquidy, and that’s totally normal.
Pour it into your prepared pan and bake for 30–35 minutes, or until the centre springs back when gently pressed. Cover with a baking dish right away to trap steam and keep the cake moist while it cools completely.
Step 3: Make the Buttercream Frosting
While the cake bakes, let’s get that frosting going. Beat the softened butter on medium-high for 2 minutes until it’s pale and fluffy. This step matters — don’t rush it.
On low speed, add the sifted icing sugar in 4 additions until it’s all incorporated. Add the milk and vanilla, then beat on medium-high for 3 more minutes. The result should be silky, creamy, and spreadable. Scoop it into 2 large piping bags and set aside.
Step 4: Cut the Cake Rounds
Once the cake is completely cool, use a round cutter that’s slightly smaller than your ice cream cups — about 7cm/2.8 inches works perfectly. Cut the rounds as close together as possible to reduce waste.
You should be able to get around 20 rounds out of one tray, which gives you 2 layers per dot cake. Cut carefully and try not to eat the scraps immediately (no promises).
Step 5: Assemble the Dot Cakes
Place one cake round into the bottom of an ice cream cup. Brush or drizzle it with simple syrup — this keeps each layer moist and adds a lovely subtle sweetness.
Pipe buttercream around the edge and centre of the first round. Then add the second cake round, brush with more syrup, and pipe frosting around the edge and over the entire top. Use an angled spatula to level it off smoothly.
Step 6: Dip in Sprinkles
Pour your sprinkles into a wide bowl with a lip — you want plenty of room to dip. Carefully hold each ice cream cup and press the frosted top down into the sprinkles.
Give it a gentle twist and lift. The sprinkles stick perfectly to the buttercream and create that gorgeous, colorful dot cake effect. Serve immediately or refrigerate until you’re ready to go.
Expert Tips, Variations, and Troubleshooting
Tips for the Best Results
Use cake flour, not all-purpose flour. It gives the sponge that soft, pillowy texture that makes this chocolate chip dot cake (or any variation) truly special. If you only have all-purpose, swap in 2 tablespoons of cornstarch per cup to mimic the effect.
Make sure your eggs are at room temperature before you start. Cold eggs don’t whip up as well and can affect the volume of your batter. Just leave them on the counter for 30 minutes before baking.
The simple syrup step is optional, but I’d really recommend it. It keeps the individual cake rounds from drying out, especially if you’re making these ahead of time. You can even flavor your syrup with a splash of lemon or almond extract for a fun twist.
Fun Variations to Try
For a chocolate chip dot cake, fold 1/2 cup of mini chocolate chips into the batter just before pouring into the pan. They’ll stay suspended beautifully in the sponge and add little pockets of melty chocolate in every bite.
Want a colorful dot cake recipe effect inside the batter too? Divide the batter into 3 bowls, tint each with gel food coloring, and pour them in alternating spoonfuls before baking. The cross-section looks stunning when you layer the rounds.
You can also swap the vanilla buttercream for a cream cheese frosting if you want something with a bit more tang. It pairs beautifully with a lemon-zest sponge variation.
Troubleshooting Common Issues
If your cake sinks in the middle, it likely needed a few more minutes in the oven. Next time, test the centre with a light press — it should spring back fully. Covering with a baking dish right out of the oven also helps prevent sinking as it cools.
Buttercream too stiff? Add milk one teaspoon at a time until it loosens to a pipeable consistency. Too soft? Refrigerate for 15 minutes and re-beat. It’s very forgiving once you know the fix.
Sprinkles not sticking? Your buttercream might need to be a touch softer on the surface. Try pressing the cup into the sprinkles with a little more pressure, or chill the assembled cakes for 5 minutes first so the frosting firms up slightly on the sides.
Storage, Reheating, and No-Waste Kitchen Ideas
| Storage Method | Duration | Notes |
|---|---|---|
| Refrigerator (assembled) | Up to 3 days | Store in an airtight container; add sprinkles just before serving for best look |
| Refrigerator (unassembled cake rounds) | Up to 4 days | Wrap rounds tightly in plastic wrap to prevent drying out |
| Freezer (cake rounds only) | Up to 2 months | Freeze in a single layer first, then stack with parchment between each round |
| Freezer (assembled) | Not recommended | Sprinkles bleed color when thawed and frosting texture changes |
These dot cakes are best served at room temperature. If you’ve refrigerated assembled ones, let them sit out for 15–20 minutes before serving. This brings the buttercream back to that perfect soft, creamy texture.
Have leftover cake scraps from the cutting step? Don’t throw them away! Crumble them up and layer with frosting in a glass for a quick trifle-style dessert. Or mix the scraps with a little buttercream and roll into cake pop balls. No waste, all delicious.
Leftover buttercream freezes beautifully for up to 3 months. Scoop it into a zip-lock bag, press out the air, and freeze flat. Thaw overnight in the fridge and re-beat before using. It’s perfect for topping gluten-free baked goods or quick weeknight cupcakes.
Nutritional Information
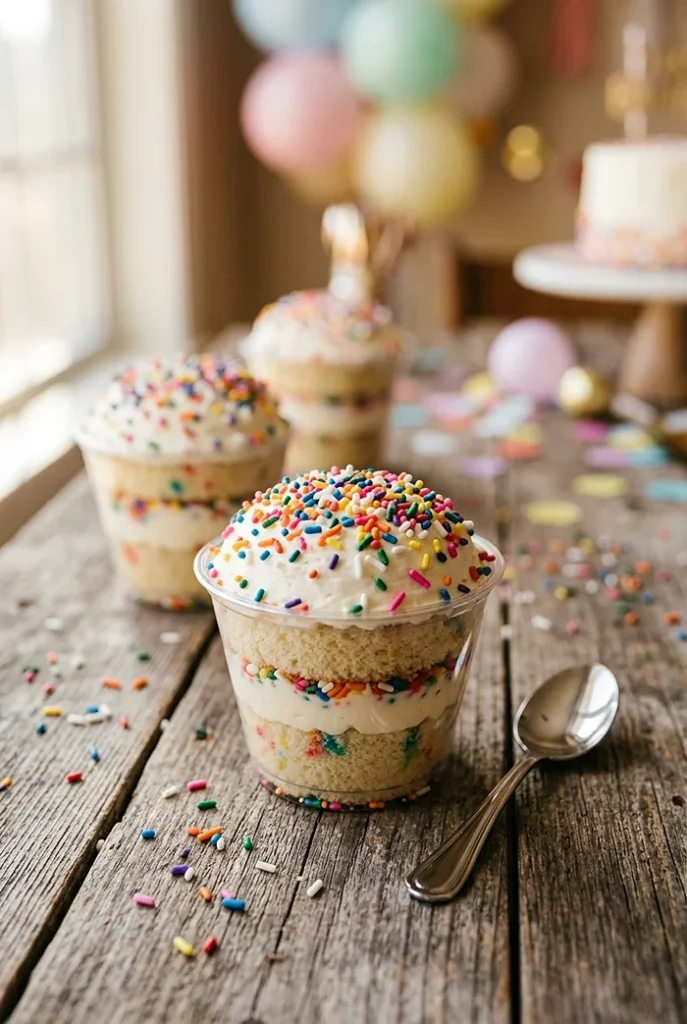
Nutritional values are approximate and based on one assembled dot cake (one serving out of 10).
| Nutrient | Per Serving |
|---|---|
| Calories | ~680 kcal |
| Total Fat | ~34g |
| Saturated Fat | ~21g |
| Carbohydrates | ~90g |
| Sugar | ~72g |
| Protein | ~5g |
| Sodium | ~260mg |
This recipe is just the beginning. Over in the collection, you’ll find even more dishes that are just as easy and packed with flavor. Go take a peek — your next favorite is waiting.
Frequently Asked Questions
Can I make this dot cake recipe ahead of time?
Absolutely! You can bake and cut the cake rounds up to 4 days ahead and store them wrapped in the fridge. Make the buttercream 2–3 days in advance and refrigerate it separately. Assemble and dip in sprinkles on the day you plan to serve them for the best look.
What size ice cream cups work best?
Standard paper ice cream cups that hold about 1 cup (240ml) work perfectly. Look for the flat-bottomed style so the cakes sit level. The 7cm/2.8-inch round cutter is sized to fit most standard cups with a little gap around the sides for the frosting.
Can I make a colorful dot cake recipe using this base?
Yes, and it looks incredible! Simply divide the batter into portions, tint each with gel food coloring, and pour them in alternating scoops into the pan before baking. The swirled cross-section inside each round is a stunning surprise when assembled.
Can I use salted butter instead of unsalted?
You can, but reduce or skip the added salt in the cake batter. For the buttercream, salted butter can actually add a nice contrast to the sweetness, but the flavor will be slightly different. Most bakers prefer unsalted for better control over the final taste.
What can I use instead of sprinkles for decoration?
Crushed freeze-dried fruit, mini chocolate chips, toasted coconut flakes, or fine sugar pearls all work beautifully. Just make sure whatever you use is dry so it adheres well to the buttercream top without making it soggy.
Final Thoughts
This dot cake recipe is one of those rare bakes that looks totally impressive but is actually very manageable, even for beginner bakers. Individual servings, zero awkward slicing, and a sprinkle dip that makes everyone go “wait, how did you do that?”
Whether you’re making these for a birthday party, a bake sale, or just a regular Tuesday that needs some joy, they deliver every single time. The hot milk sponge stays tender, the vanilla buttercream is dreamy, and the sprinkle coating makes them look like they came from a fancy bakery.
Looking for more fun bakes to pair with these? These chicken salad croissants and pulled chicken sliders make a brilliant party spread alongside these little cakes.
If you give this easy dot cake recipe a try, I’d love to hear how it went! Drop your thoughts in the comments below, and if you made any fun variations, share those too. And if your dot cakes turned out as cute as I know they will, please share them on Pinterest — tag the post so others can find this recipe and make their own!
Dot Cake Recipe
Equipment
- 40x30x5cm rectangular baking pan
- Parchment paper
- Saucepan
- Stand mixer with whisk attachment
- Sifter
- Mixing bowls
- 7cm / 2.8-inch round cookie cutter
- 2 large piping bags
- Angled spatula
- Wide bowl with lip (for sprinkles)
- Pastry brush
- 10 ice cream cups
Ingredients
For the Cake
- 1 ¼ cups whole milk 310ml / 11 fl oz
- 1 stick butter 113g
- 1 tsp salt
- 2 cups cake flour, sifted 300g / 10.6 oz
- 2 tsp baking powder
- 1 ¾ cups caster or superfine sugar 385g / 13.6 oz
- 4 eggs, room temperature large
- 1 tbsp vanilla bean paste
For the Frosting and Decoration
- 400 g butter, softened 14 oz, not melted
- 900 g pure icing sugar or icing sugar mixture, sifted 2 lbs
- 1-2 tbsp milk use 2 tbsp if using pure icing sugar
- 1 tbsp vanilla bean paste
To Assemble
- ½ cup simple syrup 125ml / 4 fl oz, optional but recommended
- 180 g sprinkles 6 oz
- 10 ice cream cups flat-bottomed paper cups
Instructions
- Line a 40x30x5cm (15x12x2 inch) rectangular pan with parchment paper on the base and sides. Preheat your oven to 160C/320F (fan forced) or 180C/350F (conventional). In a saucepan, heat the milk and butter together until the butter melts. Stir in the salt — just scald the milk, do not boil it. Set aside to cool slightly. Sift the flour and baking powder together into a separate bowl.
- In a stand mixer with the whisk attachment, beat the sugar, eggs, and vanilla bean paste on medium-high for 5 full minutes until thick, pale, and almost white. Pour in the hot milk mixture and whisk for 15 seconds until incorporated. Fold in the flour mixture on low speed in two lots until smooth — do not overmix. The batter will be very liquidy; this is normal. Pour into the prepared pan and bake for 30–35 minutes, or until the centre springs back when gently pressed. Cover immediately with a baking dish to trap steam and cool completely.
- While the cake bakes, make the buttercream. Beat the softened butter on medium-high speed for 2 minutes until pale and fluffy. On low speed, add the sifted icing sugar in 4 additions until incorporated. Add the milk and vanilla bean paste, then beat on medium-high for 3 minutes until silky, fluffy, and creamy. Scoop into 2 large piping bags and set aside.
- Once the cake is completely cool, use a round cutter slightly smaller than your ice cream cups — about 7cm/2.8 inches. Cut the rounds as close together as possible to minimise waste. You should get approximately 20 rounds, giving you 2 layers per dot cake.
- Place one cake round into the bottom of an ice cream cup and brush or drizzle with simple syrup. Pipe buttercream around the edge and in the centre. Place the second cake round on top, add more syrup, then pipe buttercream around the edge and over the entire top. Level off with an angled spatula.
- Pour the sprinkles into a wide bowl with a lip. Carefully hold each assembled ice cream cup and press the frosted top down into the sprinkles, giving a gentle twist. Lift and serve immediately, or refrigerate until ready to serve.