Black Sesame Ice Cream
Craving a scoop of nutty, silky Black Sesame Ice Cream that tastes like your favorite Japanese dessert shop? This homemade version is rich, toasty, and way easier to make than you’d think.
Okay, so real talk: the first time I tried goma ice cream at a tiny shop in Osaka, I nearly cried into my cone. It was nutty, a little bittersweet, and somehow both cozy and fancy at once. I came home determined to crack the code, and after way too many test batches, this is the recipe that made my kitchen smell like a sesame candy shop (in the best way).
Table of Contents
Why You’ll Love This Recipe
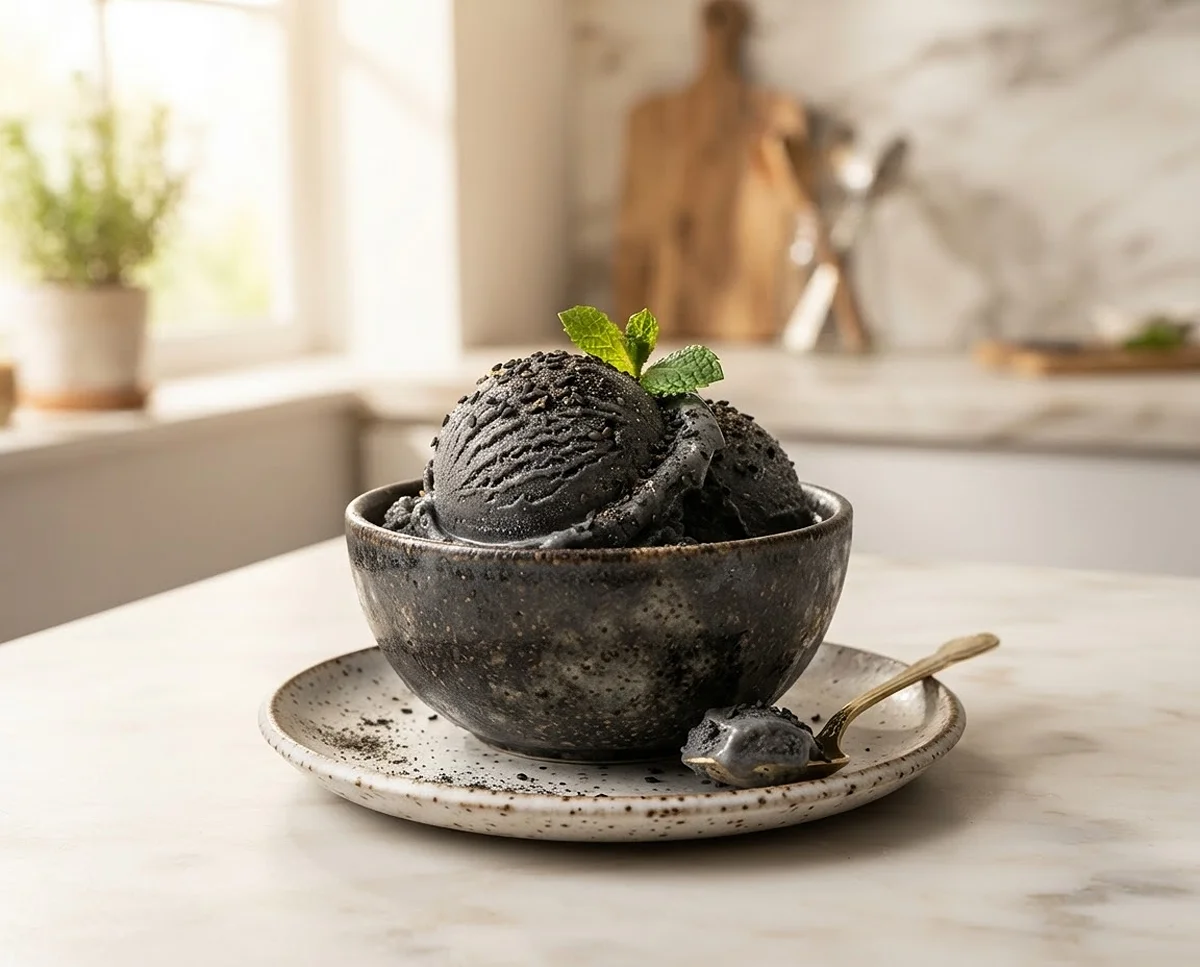
This Black Sesame Ice Cream is a custard-based, churned treat with a deep toasty flavor and a gorgeous gray-purple color that always gets a “wait, what IS that?” from guests.
It’s basically Japanese Black Sesame Ice Cream meets classic French custard technique, so you get that rich, scoopable texture without any weird icy bits. If you love browsing our Japanese dessert recipes, this one is about to become a regular in the rotation.
- Deep, toasty, slightly nutty flavor that isn’t overly sweet
- Naturally gorgeous grayish-lavender color, no food coloring needed
- Silky, scoopable texture thanks to a classic custard base
- Freezer-friendly, so you can make it ahead for parties
What You’ll Need: Ingredients
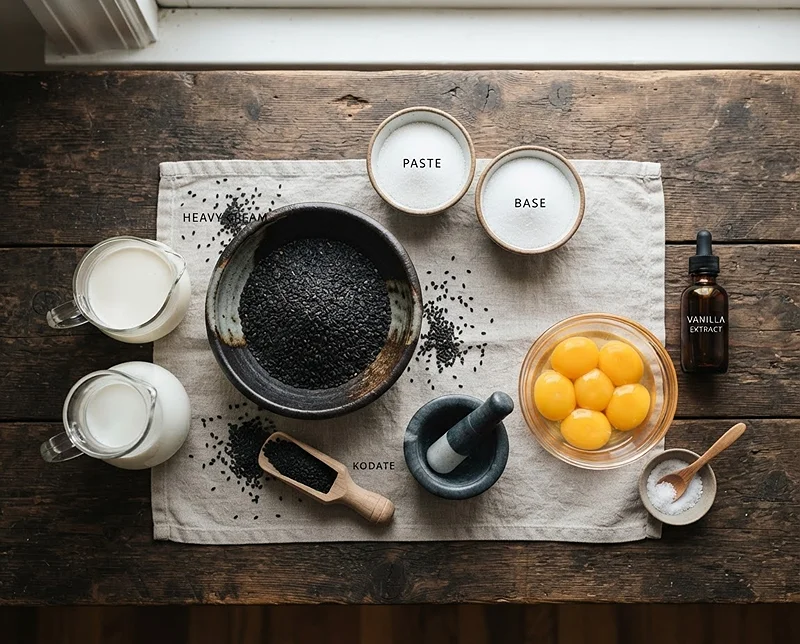
Here’s everything for this Goma Ice Cream, split into the sesame paste and the custard base so nothing gets confusing.
For the Black Sesame Paste
| Ingredient | Amount |
|---|---|
| Black sesame seeds | 1 cup |
| Granulated sugar | 1/2 cup |
For the Ice Cream Base
| Ingredient | Amount |
|---|---|
| Heavy cream | 1 1/2 cups |
| Whole milk | 1 cup |
| Granulated sugar | 1/2 cup |
| Salt | 1/4 teaspoon |
| Large egg yolks | 5 |
| Vanilla extract | 1 teaspoon |
That’s it. No fancy mail-order ingredients here, just black sesame seeds (find them at most Asian grocery stores) and pantry basics you probably already have.
Step-by-Step Instructions
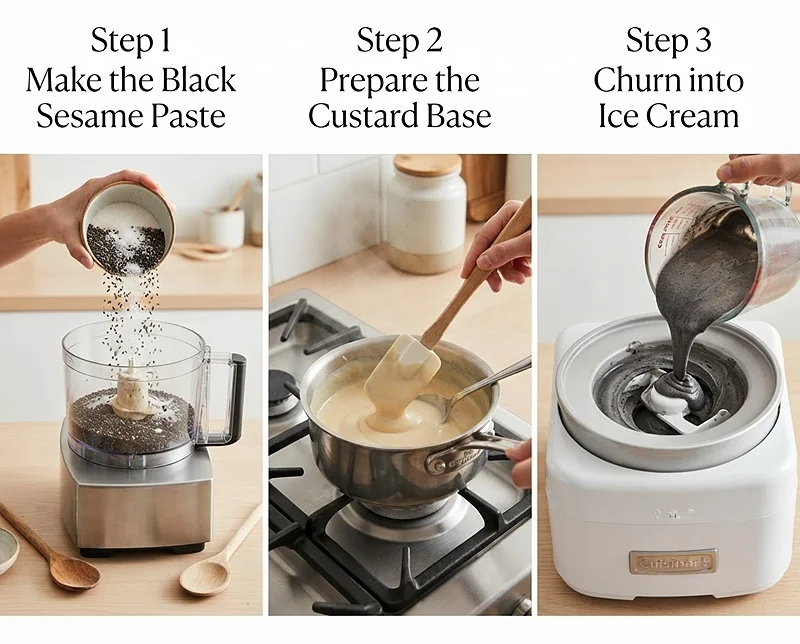
Toast and Blend the Black Sesame Paste
Toss the black sesame seeds into a dry skillet over medium-low heat. Stir them around for 5-7 minutes until they smell warm and nutty, kind of like popcorn’s fancy cousin.
Watch them closely near the end. Black sesame seeds are already dark, so it’s easy to accidentally burn them without noticing, and burnt sesame tastes bitter, not toasty. Let them cool completely before the next step.
Dump the cooled seeds and the 1/2 cup of sugar into a food processor. Process until it turns into a fine, glossy, slightly oily paste, this can take a few minutes, so be patient and scrape the sides down as needed.
“The first time I made this, I gave up too early and ended up with sesame sand instead of paste,” a friend once told me. Don’t quit early. Keep blending until it’s smooth and spreadable, almost like a nutty tahini.
Build the Custard Base
In a medium saucepan, combine the heavy cream, whole milk, remaining 1/2 cup sugar, and salt. Heat over medium, stirring now and then, just until the sugar dissolves and the mixture starts to gently steam and simmer. Do not let it boil.
While that’s heating, whisk your egg yolks in a separate bowl until they turn pale and a little fluffy looking. This is your safety net against scrambled eggs later.
Temper the Eggs (Don’t Skip This)
Slowly whisk about half of the hot cream mixture into the egg yolks, just a little at a time. This gently warms the eggs up so they don’t turn into sweet scrambled eggs when they hit the hot pan.
Pour the tempered egg mixture back into the saucepan with the rest of the cream. Cook over medium-low heat, stirring constantly with a rubber spatula, until it thickens enough to coat the back of the spatula, around 170-175°F.
Run your finger across the spatula. If it leaves a clean line that doesn’t fill back in, you’re golden. Just don’t let it boil, or you’ll end up with sweet scrambled eggs instead of custard.
Add the Sesame Flavor and Chill
Take the pan off the heat and stir in your black sesame paste and vanilla extract until it’s smooth and completely combined. The mixture should turn a beautiful dusty lavender-gray right before your eyes.
For an ultra-silky texture, strain the mixture through a fine-mesh sieve into a clean bowl. This catches any stray lumps or overcooked egg bits.
Cover and refrigerate for at least 4 hours, though overnight is even better. This chilling step matters, a cold base churns into creamier ice cream with smaller ice crystals.
Churn and Freeze
Pour your thoroughly chilled base into your ice cream maker and churn according to the manufacturer’s directions. It’ll come out looking like soft-serve, which is totally normal at this stage.
Scoop the soft ice cream into an airtight container and freeze for at least 4-6 hours, or until it’s firm enough to scoop into neat little balls. Then it’s officially snack time.
Expert Tips, Variations, and Troubleshooting
Tips for the Best Texture
Chill your ice cream maker’s bowl for a full 24 hours before churning, not just overnight. A truly frozen bowl makes a huge difference in how creamy your final texture turns out.
Also, don’t rush the custard-cooking step. Low and slow heat gives you a smoother, more stable base than cranking the heat to speed things along.
No-Churn Option
No ice cream maker? No problem. You can turn this into No-Churn Black Sesame Ice Cream by folding the cooled sesame mixture into 2 cups of whipped heavy cream, then freezing it in a loaf pan for 6 hours, stirring once halfway through.
Fun Variations to Try
Swirl in a spoonful of matcha paste for a green tea and sesame combo that looks stunning in a bowl. You could also fold in crushed toasted sesame brittle for crunch, or drizzle with a little honey right before serving.
Common Troubleshooting
If your custard looks curdled or grainy, it likely got too hot too fast. Straining it through a fine-mesh sieve usually saves the batch, so don’t panic and toss it.
If your finished ice cream turns out icy instead of creamy, the base probably wasn’t chilled long enough before churning, or it sat in the freezer too long after softening. Try to enjoy it within two weeks for the best texture.
Storage, Reheating, and No-Waste Tips
| Method | How Long | Notes |
|---|---|---|
| Airtight container, freezer | Up to 2 weeks | Best texture within the first week |
| Room temperature before scooping | 5-10 minutes | Softens for easier scooping |
This is ice cream, so there’s no reheating involved here, just let it sit out for a few minutes before scooping if it’s rock hard. Press a piece of parchment or plastic wrap directly on the surface before sealing the lid, it helps prevent icy crystals from forming.
For a no-waste idea, save any leftover egg whites from this recipe for a batch of meringues or an omelet the next morning. Leftover sesame paste, if you have extra, is fantastic stirred into oatmeal or drizzled over pancakes.
Nutritional Information
| Nutrient | Approximate Amount (per 1/2 cup serving) |
|---|---|
| Calories | 290 |
| Fat | 22g |
| Carbohydrates | 19g |
| Protein | 5g |
| Sugar | 16g |
Values are estimates and will vary depending on your exact ingredients and brands used.
Frequently Asked Questions
Can I use black sesame paste instead of making my own?
Yes, store-bought black sesame paste works great if you want to skip a step. Just use about 1/2 cup and taste as you go, since store-bought pastes vary in sweetness.
Do I need an ice cream maker for this recipe?
No, you can make a no-churn version by folding the sesame mixture into whipped cream and freezing it directly in a loaf pan, stirring once partway through freezing.
Why is my black sesame ice cream not very purple?
Color intensity depends on how finely your sesame seeds are ground and how dark your seeds are to begin with. A longer blend time in the food processor usually deepens the color.
Can I make this ice cream ahead of time for a party?
Absolutely, this recipe actually tastes better after a day or two in the freezer once the flavors settle. Just store it airtight with plastic wrap pressed on the surface.
Is black sesame ice cream very sweet?
Not really, it has a toasty, slightly nutty flavor that’s less sweet than most vanilla or chocolate ice creams. That’s part of what makes it feel so special and grown-up.
Conclusion
This Black Sesame Ice Cream is proof that a little patience in the kitchen pays off big time. It’s nutty, creamy, and honestly kind of impressive to serve to guests.
If you’re in the mood for more cool treats, check out our no-bake dessert recipes or browse the full recipe collection for more inspiration.
Pair it with something from our Japanese dinner recipes for a full at-home Tokyo-style night.
Give this recipe a try, snap a photo of that gorgeous lavender scoop, and pin it on Pinterest so you don’t lose it. And if you make it, come back and tell me how it turned out, I genuinely love hearing about your kitchen wins.
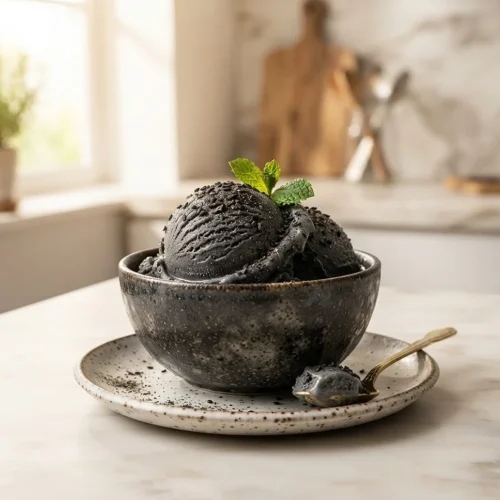
Dreamy Black Sesame Ice Cream
Equipment
- Dry skillet
- Food Processor
- Medium saucepan
- Whisk
- Rubber spatula
- Fine-mesh sieve
- Ice cream maker
- Airtight container
Ingredients
For the Black Sesame Paste
- 1 cup Black sesame seeds
- ½ cup Granulated sugar for the paste
For the Ice Cream Base
- 1 ½ cups Heavy cream
- 1 cup Whole milk
- ½ cup Granulated sugar for the base
- ¼ teaspoon Salt
- 5 Large egg yolks
- 1 teaspoon Vanilla extract
Instructions
- Toast the black sesame seeds in a dry skillet over medium-low heat for 5-7 minutes, stirring frequently, until fragrant. Watch closely so they don’t burn. Let cool completely.
- Transfer the toasted seeds and 1/2 cup granulated sugar to a food processor. Process until a fine, glossy, slightly oily paste forms, scraping down the sides as needed. Set aside.
- In a medium saucepan, combine the heavy cream, whole milk, remaining 1/2 cup sugar, and salt. Heat over medium heat, stirring occasionally, until the sugar dissolves and the mixture is just simmering. Do not boil.
- In a separate bowl, whisk the egg yolks until light and pale in color.
- Gradually temper the egg yolks by slowly whisking about half of the hot cream mixture into them. This prevents the eggs from scrambling.
- Pour the tempered egg mixture back into the saucepan with the remaining cream. Cook over medium-low heat, stirring constantly, until it thickens enough to coat the back of a spatula, around 170-175°F. Do not boil.
- Remove from heat and stir in the black sesame paste and vanilla extract until smooth. Strain through a fine-mesh sieve into a clean bowl for an extra-silky texture, if desired.
- Cover and refrigerate the mixture for at least 4 hours, or preferably overnight, until thoroughly chilled.
- Pour the chilled base into your ice cream maker and churn according to the manufacturer’s instructions. It will have a soft-serve consistency.
- Transfer the soft ice cream to an airtight container and freeze for at least 4-6 hours, or until firm, before serving.