Hojicha Ice Cream
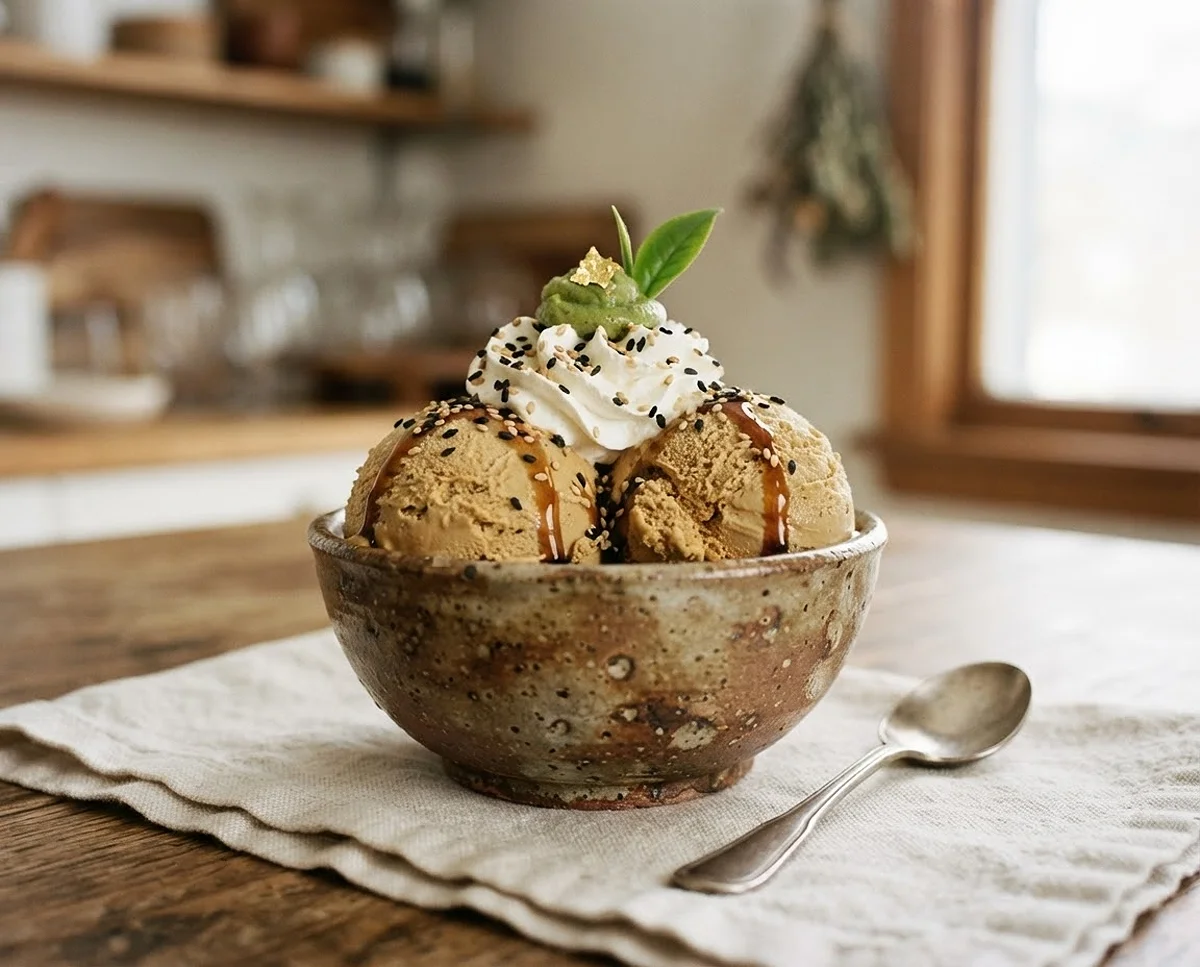
This creamy Hojicha Ice Cream recipe turns toasty roasted green tea into the coziest homemade dessert you’ve ever scooped. It’s rich, it’s simple, and it tastes like a warm hug in frozen form.
I stumbled onto hojicha at a tiny tea shop years ago and honestly, I never looked back. There’s something about that toasty, almost caramel-like aroma that makes me want to turn everything into ice cream, so that’s exactly what I did here.
I remember standing at the counter of that shop, watching them scoop out the roasted leaves, and thinking it smelled more like a cozy autumn afternoon than actual tea. That memory is basically the whole reason this recipe exists.
Table of Contents
Why You’re Going to Love This Hojicha Ice Cream
If you’ve only ever had matcha ice cream, get ready for a plot twist. This Japanese Hojicha Ice Cream is nuttier, toastier, and way less bitter, since hojicha leaves are roasted instead of steamed like regular green tea.
It’s a proper custard-style ice cream, meaning it’s rich, silky, and scoops like a dream straight out of the freezer. No weird ice crystals, no bland flavor, just cozy roasted green tea ice cream in every single bite.
Think of it as the more laid-back, toasty cousin to matcha. If you’re into rich, creamy homemade recipes, this one belongs on your must-try list.
It’s also a fantastic dessert for anyone who wants to branch out beyond classic vanilla or chocolate. The flavor is unique enough to impress guests, but familiar enough that even picky eaters usually come back for seconds.
What You’ll Need for This Hojicha Ice Cream
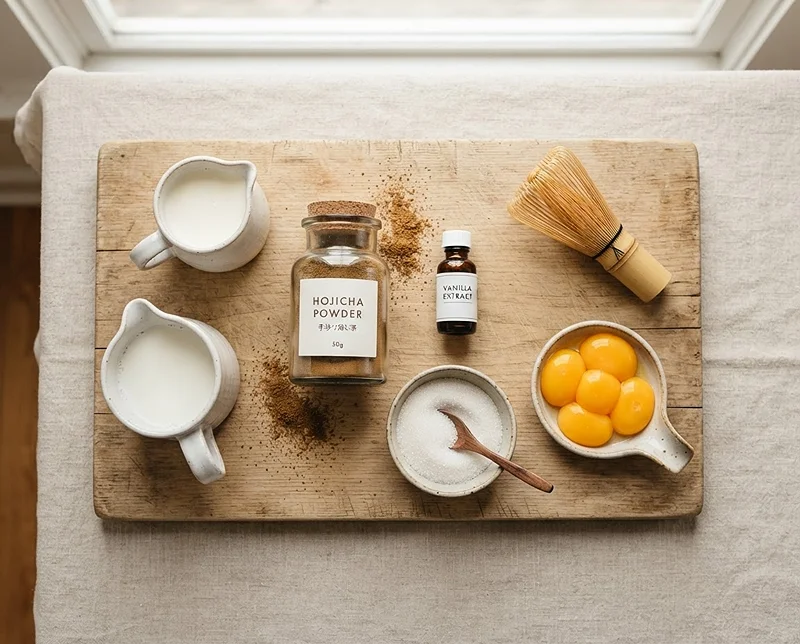
This recipe keeps things simple. Six ingredients, one saucepan, and a little patience is all it takes to make this Matcha and Hojicha Dessert alternative that’s honestly even better than the tea shop version.
| Ingredient | Amount | Notes |
|---|---|---|
| Whole milk | 1 cup | Gives the base its light, creamy texture |
| Heavy cream | 1 cup | This is where all that rich, scoopable texture comes from |
| Hojicha powder | 1 tablespoon | The star of the show, don’t skimp here |
| Vanilla extract | 1 teaspoon | Rounds out the toasty flavor beautifully |
| Granulated sugar | ½ cup | Sweetness plus it helps with that soft-scoop texture |
| Egg yolks | 5 large | Egg yolks are what make this a true custard-style ice cream |
Hojicha powder can usually be found online or at Japanese grocery stores. It’s worth seeking out, since it’s the whole reason this Roasted Green Tea Ice Cream tastes so unique.
How to Make Hojicha Ice Cream
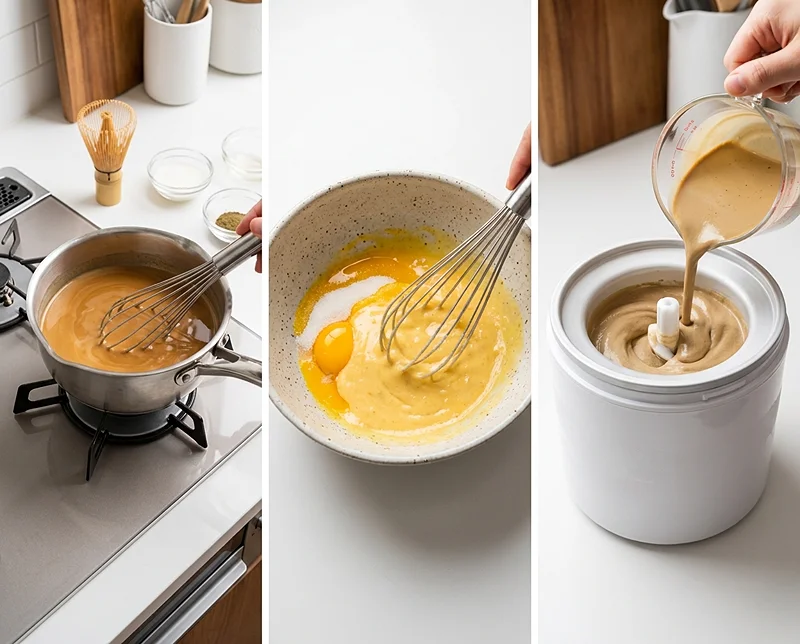
Here’s the fun part. This recipe is basically a classic custard ice cream method with hojicha powder whisked right into the milk, so if you’ve made ice cream before, you already know the drill.
Step 1: Warm the Hojicha Milk
Whisk the whole milk, heavy cream, hojicha powder, and vanilla extract together in a small saucepan. Heat everything over low heat until warm, about 5 minutes, giving it a taste along the way to check the temperature. Turn off the heat once it’s warm, not boiling.
Your kitchen should start smelling toasty and a little nutty at this point. That’s exactly what you want.
Step 2: Temper Your Egg Yolks
In a small bowl, whisk together the sugar and egg yolks until they’re pale and well combined. Slowly add about a quarter cup of the warm hojicha milk mixture, whisking constantly.
This step is called tempering, and it’s basically just gently raising the temperature of the eggs so they don’t scramble when they meet the hot milk. Take your time here, it makes all the difference.
Step 3: Cook the Custard
Pour the tempered egg mixture back into the saucepan with the rest of the hojicha milk. Return it to the stove and heat gently, stirring the whole time, until the custard reaches 170 degrees F and coats the back of a spoon.
You’ll know it’s ready when you run a finger across the back of the spoon and it leaves a clean line. The mixture should look silky and pale tan, with that toasty hojicha aroma filling up the whole kitchen.
Step 4: Chill Completely
Let the custard cool at room temperature for about 30 minutes. Then cover it and pop it in the fridge for 6 to 8 hours, or overnight if you can swing it, so it’s properly cold before churning.
I know waiting is the hardest part, but a fully chilled base is what gives you that smooth, creamy texture instead of icy chunks.
Step 5: Churn and Freeze
Pour the chilled custard into your ice cream maker and churn for 10 to 15 minutes, until it looks like soft-serve or frozen yogurt. Transfer it to a freezer-safe container and freeze for 3 to 4 hours, or overnight for the best scoopable texture.
Overnight really is the sweet spot in my experience. The flavor of the hojicha seems to deepen a bit as it sits.
Tips, Variations, and Troubleshooting
Pro Tips for the Best Hojicha Ice Cream
Don’t rush the chilling step, a warm base will churn poorly and give you a soft, soupy result. Also, whisk constantly while cooking the custard so the eggs don’t scramble on the bottom of the pan.
If you’re new to custard bases, this recipe is a great low-stakes place to practice, similar in technique to how you’d make a classic fruity ice cream sandwich filling.
Fun Variations to Try
Want a stronger tea flavor? Bump the hojicha powder up to 1.5 tablespoons for an extra bold Japanese Hojicha Ice Cream. You can also swirl in a little sweetened condensed milk or a spoon of matcha for a fun Matcha and Hojicha Dessert mashup.
For texture lovers, fold in some crushed toasted rice cereal or mochi bits right before the final freeze. It adds a nice little crunch against the creamy base.
Feeling adventurous? A drizzle of black sesame paste or a sprinkle of toasted sesame seeds on top brings out even more of that roasted, nutty character. It’s a small addition, but it makes the whole bowl feel a bit more special.
Troubleshooting Common Issues
Ice cream too icy? That usually means the custard wasn’t chilled long enough before churning, or it froze too slowly afterward. Custard curdled slightly while cooking? Strain it through a fine mesh sieve before chilling and it’ll smooth right back out.
How to Store Your Hojicha Ice Cream
| Storage Method | How Long | Tips |
|---|---|---|
| Freezer, airtight container | Up to 2 weeks | Press parchment paper directly on the surface to prevent ice crystals |
| Freezer, original container | Not recommended long-term | Transfer to a proper airtight container as soon as possible |
| Room temperature softening | 5 to 10 minutes | Let it sit out briefly before scooping for easier serving |
No need to reheat this one, obviously, but if it gets rock hard, just let it soften on the counter for a few minutes before scooping. For no-waste kitchen ideas, save leftover egg whites for meringues or an omelet the next morning.
Melting a little too fast? A soft-serve hojicha milkshake is a delicious way to use it up instead of tossing it, kind of like turning extra batter into a fun no-bake treat.
Nutritional Information
| Nutrient | Amount Per Serving |
|---|---|
| Calories | ~290 kcal |
| Total Fat | ~21g |
| Saturated Fat | ~12g |
| Carbohydrates | ~19g |
| Sugar | ~17g |
| Protein | ~4g |
These numbers are estimates based on 6 servings and can vary depending on your exact ingredients. If you’re curious about the roasting process behind hojicha itself, the background on hojicha tea is a genuinely interesting rabbit hole.
Frequently Asked Questions
What does hojicha ice cream taste like?
It tastes toasty, nutty, and a little roasted, with a gentle sweetness. It’s much less bitter than matcha, making it a great pick for people who find matcha desserts too intense.
Can I make this without an ice cream maker?
You can, though the texture won’t be quite as smooth. Pour the chilled custard into a shallow pan and whisk vigorously every 30 minutes as it freezes to break up ice crystals.
Where can I buy hojicha powder?
Most Japanese grocery stores carry it, and it’s widely available online as well. Look for a fine, roasted green tea powder specifically labeled for baking or drinks.
Can I make this hojicha ice cream ahead of time?
Yes, this is a great make-ahead dessert. It actually tastes even better after a full overnight freeze, so making it a day or two in advance works perfectly.
Is hojicha ice cream the same as matcha ice cream?
No, they’re different. Matcha is made from steamed green tea leaves and tastes more vegetal, while hojicha is roasted, giving it a toasty, mellow flavor instead.
Final Thoughts
This Hojicha Ice Cream is one of those recipes that feels a little fancy but is honestly pretty forgiving to make at home. Toasty, creamy, and just sweet enough, it’s a dessert worth the overnight wait.
If you love trying fun frozen treats, you might also enjoy these mini ice cream sandwiches for your next gathering.
Give this recipe a try, and if you love it as much as I do, save it to Pinterest so you can find it again later. I’d love to hear how your batch turns out, so drop a comment and let me know.
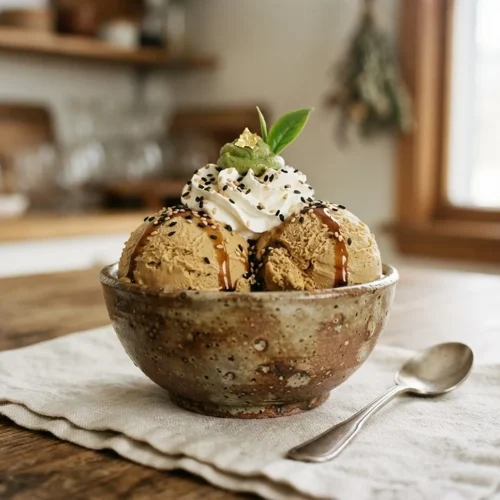
Dreamy Hojicha Ice Cream
Equipment
- Small saucepan
- Whisk
- Mixing bowl
- Ice cream maker
- Freezer-Safe Container
Ingredients
Hojicha Custard Base
- 1 cup Whole milk Gives the base its light, creamy texture
- 1 cup Heavy cream Provides the rich, scoopable texture
- 1 tbsp Hojicha powder The star flavor, don’t skimp here
- 1 tsp Vanilla extract Rounds out the toasty flavor
- ½ cup Granulated sugar Adds sweetness and helps the soft-scoop texture
- 5 Egg yolks Large egg yolks, makes this a true custard-style ice cream
Instructions
- Whisk together the whole milk, heavy cream, hojicha powder, and vanilla extract in a small saucepan. Heat over low heat until warm, about 5 minutes, tasting along the way to check the temperature. Turn off the heat once it’s warm, not boiling.
- In a small bowl, mix the sugar and egg yolks. Add 1/4 cup of the warm hojicha milk mixture and whisk until well incorporated. This tempering step raises the temperature of the eggs gradually so they don’t scramble when combined with the warm milk.
- After tempering, add the egg yolk mixture back into the saucepan with the rest of the hojicha milk. Return it to the stove and heat, stirring constantly, until the custard reaches 170 degrees F.
- Let the custard cool at room temperature for about 30 minutes. Cover and refrigerate until completely chilled, 6 to 8 hours.
- Pour the chilled custard into an ice cream maker and churn for 10 to 15 minutes, until it reaches the texture of frozen yogurt. Transfer to a freezer-safe container and freeze for 3 to 4 hours, or overnight for the best texture.