Sourdough Discard Hot Dog Buns
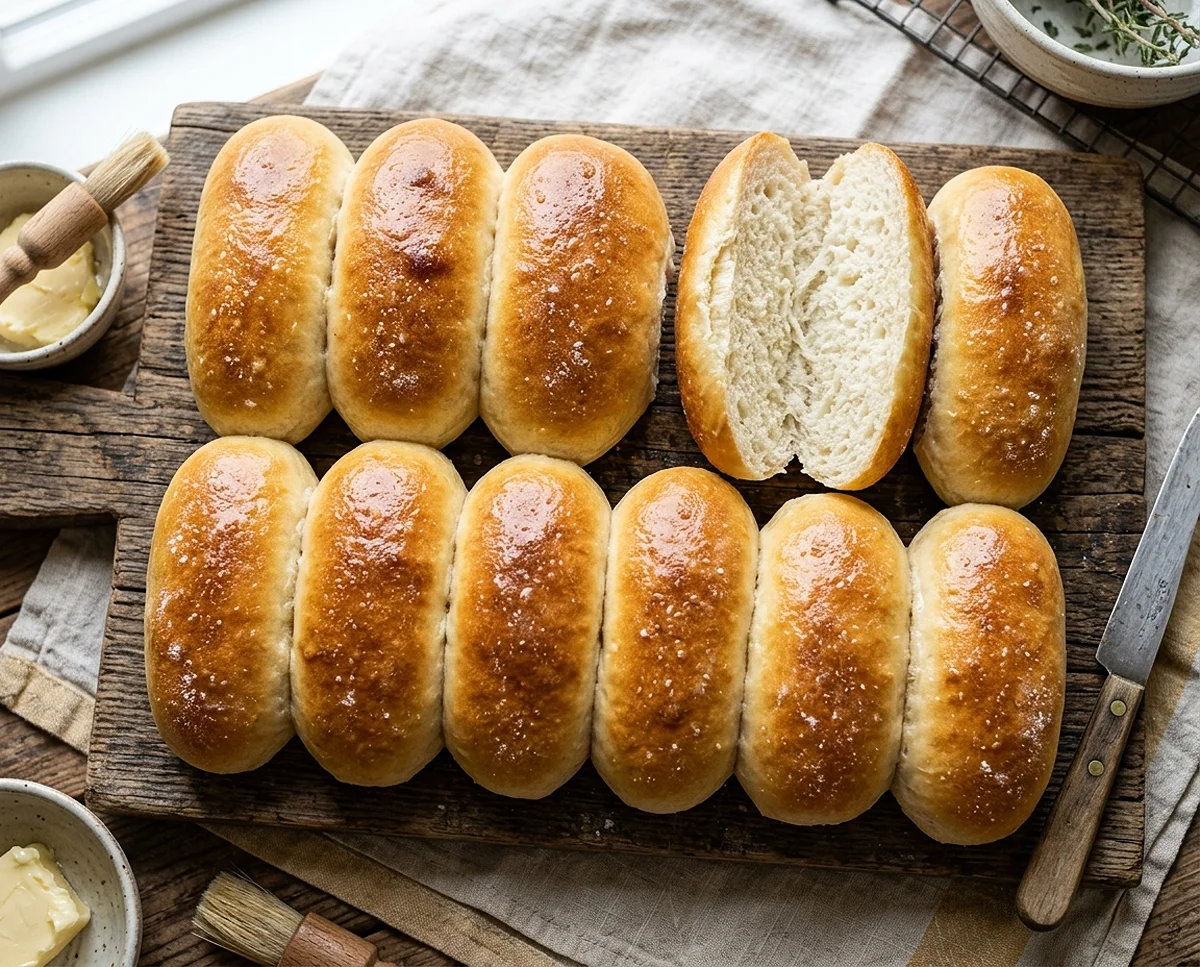
The only homemade hot dog buns you’ll ever want — sourdough discard hot dog buns are soft, pillowy, and so much better than anything from the store. Bake a batch for your next BBQ and watch them disappear before the hot dogs even hit the grill.
Okay, real talk: I used to toss my sourdough discard every single week like it was some kind of chore. Then one summer BBQ changed everything. I made these buns on a whim, and my friends genuinely thought I’d bought them from a fancy bakery.
Now these are my go-to discard bread recipe every time cookout season rolls around. They’re soft, slightly tangy, and sturdy enough to hold all your toppings without falling apart. Total game-changer.
Table of Contents
Why You’ll Love These Sourdough Discard Hot Dog Buns
Love transforming your active starter into delicious new creations? Explore our full collection of irresistible sourdough recipes, perfect for every meal and every occasion!
These aren’t just “pretty good for homemade” buns. They’re actually better than store-bought in every way that counts.
The sourdough discard adds a mild tang and depth of flavor you just can’t get from plain enriched dough. The butter and milk make them incredibly soft inside, with a golden, pillowy top that’s practically begging for a brush of melted butter.
They also bake up touching each other in the pan, which gives you that classic pull-apart style everyone loves. Perfect for a crowd, and honestly pretty fun to make too.
Ingredients You’ll Need
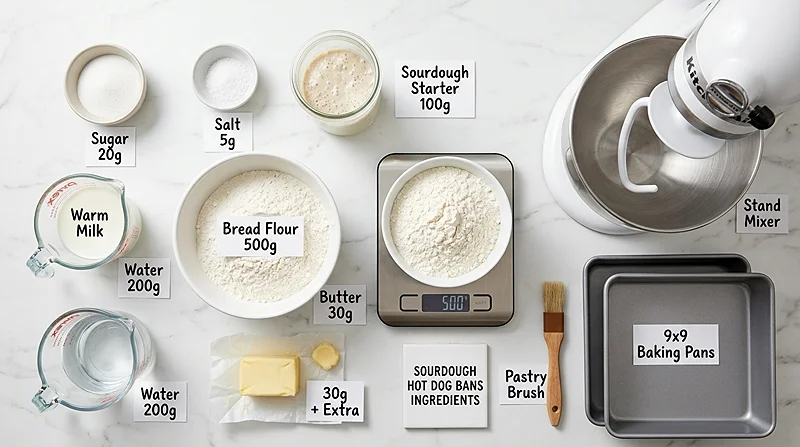
Here’s everything to grab before you start. Nothing fancy — just pantry staples and your trusty sourdough discard.
| Ingredient Group | Ingredient | Amount |
|---|---|---|
| Wet Ingredients | Warm milk | 100 g |
| Wet Ingredients | Water | 200 g |
| Wet Ingredients | Sugar | 20 g |
| Starter | Sourdough starter (active or discard — see notes) | 100 g |
| Dry Ingredients | Bread flour | 500 g |
| Dry Ingredients | Salt | 5 g |
| Enrichment | Butter (plus extra for brushing) | 30 g |
Quick note on the sourdough starter: you can use active, bubbly starter or plain discard here. Active starter will give you a faster rise and a slightly more pronounced tang. Discard works great too — just expect the rise to take a bit longer.
Step-by-Step Instructions
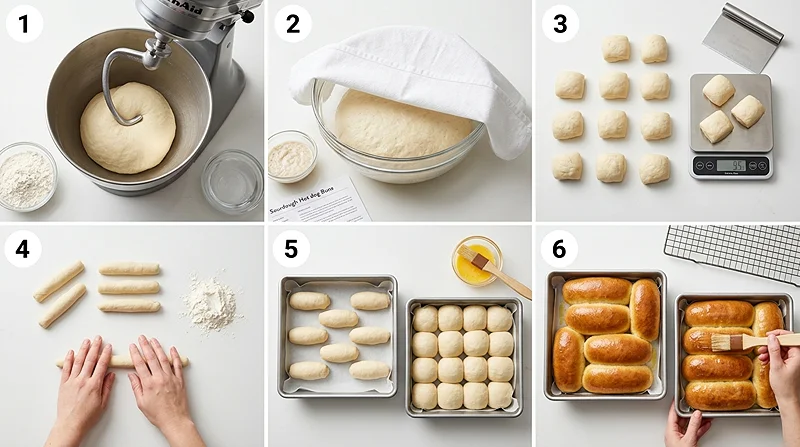
Don’t let the multi-step process intimidate you. Each step is pretty simple, and the result is absolutely worth it. Let’s do this.
Step 1 — Mix the Wet Base
Add your warm milk, water, and sugar to the bowl of your stand mixer. Give it a quick stir with a spatula until the sugar dissolves. It only takes about 30 seconds — no need to overthink it.
Make sure your milk is warm but not hot. You want it around body temperature, just enough to help things along without killing any of the starter’s activity.
Step 2 — Knead the Dough
Add the sourdough starter, bread flour, salt, and butter to the bowl. Attach the dough hook and knead for several minutes until the dough is smooth, elastic, and pulls away from the sides cleanly.
This dough should NOT be sticky. It comes together into one nice, round ball — almost like a soft Play-Doh. If it’s clinging to the sides after a few minutes, add a tiny bit more flour, just a tablespoon at a time.
No stand mixer? You can absolutely knead by hand. It’ll take about 10 minutes of solid kneading, but it’s a great arm workout and oddly satisfying.
Step 3 — First Rise
Transfer the dough to a lightly greased bowl, cover it with plastic wrap or a damp towel, and set it somewhere warm-ish to rise.
You’re looking for about a 50% increase in size, not a full double. Because this is an enriched dough (butter + milk slow things down), this rise can take anywhere from 3 to 6 hours depending on your kitchen temp and starter strength. Be patient — it’s worth it.
Step 4 — Divide and Shape
Turn the risen dough out onto a clean counter and divide it into 10 equal pieces. I weigh mine at around 95 g each for perfectly uniform buns — a kitchen scale is your best friend here.
To shape each bun, form a rough ball, flatten it out slightly, then roll it up into a log. Let the logs rest for 10 minutes, then drag each one toward you on the counter. The slight stickiness on the bottom creates surface tension that gives you a tighter, smoother bun. It’s a small step that makes a big difference.
Step 5 — Pan Up and Second Rise
Place 5 buns into each of two 9×9-inch square cake pans. Leave a little gap between them at first — they’ll grow together during the second rise, giving you that classic pull-apart look that’s so satisfying to break open.
Preheat your oven to 180C / 350F. Let the buns sit and puff up until they’re soft, pillowy, and just touching each other. Again, enriched dough moves slowly, so give them the time they need.
These homemade hot dog buns are worth every minute of waiting. Pair them later with something like these smoky BBQ ranch turkey burgers for a seriously impressive spread.
Step 6 — Bake and Butter
Once the buns are puffy and touching, give them a light spritz of water and slide them into the oven. Bake at 180C / 350F for about 22 minutes, until the tops are lightly golden.
The moment they come out of the oven, brush them generously with butter. You don’t need to melt it first — just swipe it on with a pastry brush and the heat from the buns does all the work. The rolls will get this gorgeous, glossy, buttery finish that smells absolutely incredible.
Transfer the pans to a wire rack and let the buns cool completely before pulling them apart. I know it’s hard. But cutting into them too soon can make them gummy inside — trust the process.
Expert Tips for Perfect Sourdough Discard Hot Dog Buns
Timing Tips
If you want fresh buns ready by dinner, start the dough in the morning. The bulk rise and second proof can easily be stretched across the day without any fuss.
You can also do a cold retard — let the shaped buns proof overnight in the fridge, then bake straight from cold the next day. Add about 5 extra minutes to the bake time.
Getting the Best Rise
Enriched doughs are slower risers than lean doughs, so don’t panic if yours takes longer than expected. A warm oven with just the light on makes a cozy proofing spot in cooler kitchens.
Using active, bubbly starter will speed things up noticeably. If you’re using discard and your rise is really dragging, a warmer environment (around 78-80F) usually does the trick.
Shaping Secrets
That 10-minute bench rest before the final shaping isn’t optional — it relaxes the gluten so the dough stops fighting you when you roll it into logs. Skip it and you’ll end up with stubby, springy buns that won’t hold their shape.
Consistent sizing also matters more than you’d think. Buns that are all the same weight bake evenly and look really professional when you pull them out of the pan.
Variations to Try
Sesame or Everything Bagel Topping
Right before baking, brush the buns with a beaten egg instead of water and sprinkle on sesame seeds or everything bagel seasoning. It gives them a beautiful golden color and an extra layer of flavor that’s especially great for BBQ bread.
Dairy-Free Version
Swap the milk for oat milk or another plant-based milk, and use vegan butter. The texture is slightly different but still wonderfully soft. Great option if you’re cooking for guests with dietary restrictions.
Garlic Butter Finish
Mix a clove of minced garlic and a pinch of parsley into the softened butter before brushing. It turns these into something between a hot dog bun and a garlic bread roll, which is honestly just as incredible as it sounds.
Troubleshooting Common Issues
Dough Won’t Come Together
If your dough looks shaggy after a few minutes of kneading, give it a little more time before adding flour. Sometimes it just needs another minute or two to fully hydrate and smooth out.
Buns Aren’t Rising
Check your starter — if it hasn’t been fed recently, it might be sluggish. A warmer proofing environment and a bit more time usually solves the problem. Don’t be tempted to rush with heat, though; too much warmth can actually kill yeast activity.
Tops Getting Too Dark
If your buns are browning faster than you’d like, tent them loosely with foil around the 15-minute mark. They’ll finish baking without over-coloring on top.
Storage Instructions
| Storage Method | Container | Duration |
|---|---|---|
| Room Temperature | Airtight bag or container | Up to 3 days |
| Refrigerator | Wrapped tightly in plastic wrap | Up to 5 days |
| Freezer | Zip-lock freezer bag, individually wrapped | Up to 2 months |
Reheating Tips
To reheat from room temp, wrap in foil and warm in a 300F oven for about 8 minutes. From frozen, thaw at room temp for an hour first, then warm in the oven. A quick 15-second zap in the microwave also works in a pinch — just don’t overdo it or they’ll get chewy.
No-Waste Kitchen Ideas
Got a slightly stale bun or two? Slice them up and toast in butter for the most incredible croutons you’ve ever had. They’re also amazing torn into chunks for a savory bread pudding or used as the base for mini bruschetta bites.
Leftover buns can also be sliced, buttered, and toasted in a pan for a quick side dish alongside street corn chicken bowls. Honestly, these buns make everything better.
Nutritional Information
Approximate values per bun (1 of 10). These are estimates and will vary based on exact ingredients used.
| Nutrient | Amount Per Bun |
|---|---|
| Calories | ~220 kcal |
| Carbohydrates | ~38 g |
| Protein | ~7 g |
| Fat | ~5 g |
| Fiber | ~1 g |
| Sodium | ~190 mg |
Frequently Asked Questions
Can I use sourdough discard instead of active starter?
Absolutely! This recipe works great with sourdough discard. The main difference is that discard will give you a slower rise, so budget extra time for both the bulk fermentation and the second proof. The flavor will still be fantastic — maybe even slightly more tangy, which is a great thing.
Can I make the dough without a stand mixer?
Yes, you can knead this dough by hand. It takes about 10 minutes of active kneading on a clean counter. The dough is not sticky, which makes hand-kneading pretty manageable. Just keep at it until the dough is smooth and elastic.
Can I freeze sourdough discard hot dog buns?
Yes! Once fully cooled, wrap individual buns tightly in plastic wrap and store in a freezer bag for up to 2 months. Thaw at room temperature for about an hour, then warm briefly in the oven or microwave before serving.
Why is my dough not doubling in size?
Enriched doughs (those with butter and milk) naturally rise more slowly than lean doughs. If your rise seems very slow, try moving the dough somewhere warmer, like inside your oven with just the light on. Using active, recently fed starter instead of discard will also speed things up considerably.
Can I use all-purpose flour instead of bread flour?
You can, but bread flour is strongly recommended for this discard bread recipe. Bread flour has a higher protein content, which gives the buns more structure and chew. All-purpose flour will work in a pinch, but the buns may be a little softer and less sturdy.
Ready to Bake? Let’s Go!
These sourdough discard hot dog buns are the kind of recipe that quietly becomes a staple. Once you taste the difference, you’ll find it really hard to go back to the packaged kind.
If you make them, I’d love to know how they turned out! Drop a comment below or share your creation on Pinterest — it genuinely makes my day to see your bakes.
Looking for more ways to use your oven this season? Try pairing these buns with BBQ ranch turkey burgers for the ultimate cookout plate.
And if you’re in a baking mood, don’t miss this easy cake recipe or this dreamy no-bake coconut cream pie for dessert. Happy baking!
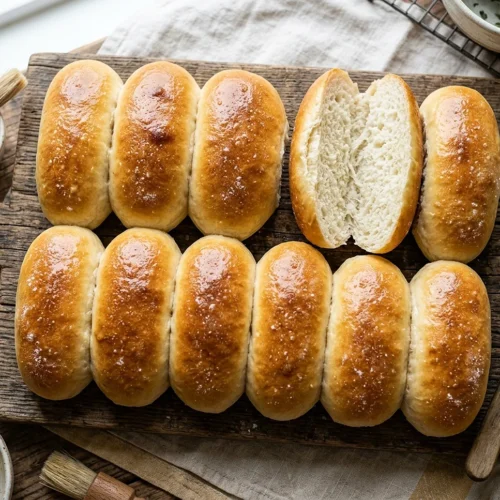
Fluffy Sourdough Discard Hot Dog Buns
Equipment
- Stand Mixer
- Dough hook
- Mixing bowl
- Kitchen scale
- 2 x 9×9-inch square cake pans
- Pastry brush
- Wire rack
Ingredients
Wet Ingredients
- 100 g Warm milk
- 200 g Water
- 20 g Sugar
Starter
- 100 g Sourdough starter active or discard
Dry Ingredients
- 500 g Bread flour
- 5 g Salt
Enrichment
- 30 g Butter plus extra for brushing
Instructions
- Add the warm milk, water, and sugar to the bowl of a stand mixer. Stir until the sugar dissolves.
- Add the sourdough starter, bread flour, salt, and butter. Knead with a dough hook until the dough is smooth, elastic, and pulls away from the sides of the bowl.
- Transfer the dough to a lightly greased bowl, cover, and let rise until increased by about 50% in size, approximately 3 to 6 hours.
- Divide the dough into 10 equal pieces, about 95 g each. Shape each piece into a rough ball, flatten slightly, roll into a log, and rest for 10 minutes. Tighten the shape by dragging each log toward you on the counter.
- Place 5 buns into each of two 9×9-inch square cake pans. Let rise until soft, pillowy, and just touching. Preheat the oven to 180°C / 350°F.
- Spritz the buns lightly with water and bake at 180°C / 350°F for about 22 minutes, until lightly golden.
- Immediately brush the hot buns generously with butter. Cool completely on a wire rack before separating and serving.