Homemade Pickles Dill
Discover the crunchiest, most garlicky homemade pickles dill recipe that blows anything store-bought completely out of the water. Just a handful of simple ingredients, one afternoon, and your fridge will smell like a proper deli.
I made these on a lazy Sunday when I had a pile of cucumbers doing absolutely nothing on my counter. One jar in, I was hooked. Now I make a double batch every single time.
Table of Contents
Why You’ll Love This Homemade Pickles Dill Recipe
So glad you tried this one! The collection has even more recipes that are just as comforting and crowd-pleasing. Go ahead, take a look — your next favorite dish is right there.
These rustic pickled cucumbers are punchy, garlicky, and loaded with that classic dill flavor. No canning equipment needed, no fuss, no drama.
The brine is perfectly balanced — tangy from the vinegar, just a touch of sweetness, and beautifully savory from the kosher salt. It’s the kind of pickle that makes you go back for “just one more” about seven times in a row.
They also pair beautifully alongside something fun and festive. Honestly, serve them next to a classic mimosa at brunch and watch your guests lose their minds.
Ingredients
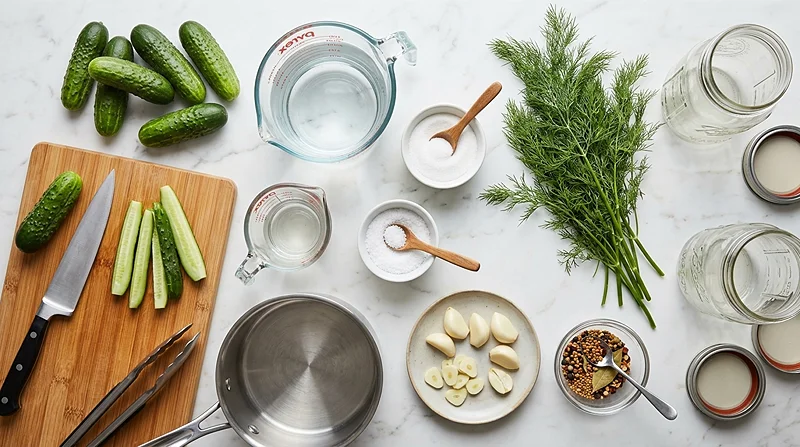
Everything here is simple, affordable, and easy to find. Here’s what you’ll need, grouped so it all makes sense at a glance.
| Category | Ingredient | Amount |
|---|---|---|
| Brine Base | Water | 3 cups |
| Brine Base | White vinegar | 3/4 cup |
| Brine Base | Granulated sugar | 3 tablespoons |
| Brine Base | Kosher salt | 2 tablespoons |
| Cucumbers | Small cucumbers (Boston pickling cucumbers work great) | 6 small |
| Aromatics | Fresh dill sprigs | 8 sprigs |
| Aromatics | Garlic cloves, peeled and thinly sliced | 4 cloves |
| Spices | Pickling spice blend | 2 tablespoons |
A Note on Cucumbers
Boston pickling cucumber recipes call for small, firm cucumbers for a reason — they stay crunchier in the brine. If you can find them at a farmers market, grab them. Regular small cucumbers from the grocery store work great too.
Avoid large, waxy cucumbers here. They turn soft faster and just don’t have the same satisfying snap when you bite in.
Step-by-Step Instructions
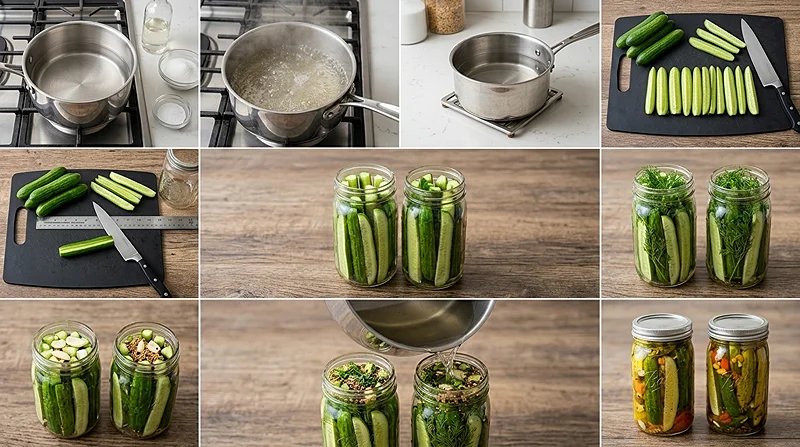
Step 1: Make the Brine
Combine the water, white vinegar, granulated sugar, and kosher salt in a medium saucepan. Bring everything to a boil over medium to medium-high heat, then reduce to low and simmer for 15 minutes.
Your kitchen is going to smell like a proper pickle shop right about now. Set the brine aside and let it cool while you prep the cucumbers.
Pro tip: Don’t rush the cooling step. Pouring scalding hot brine into jars can crack them and, more importantly, it can turn your cucumbers mushy before they even start pickling.
Step 2: Prep and Pack the Cucumbers
Wash your cucumbers well, then cut each one into 4 spears. You’ll end up with about 24 spears total. If any spears are too tall to fit comfortably inside your jars, just trim a little off one end.
Pack the cucumber spears tightly into your jars. They should be snug but not smashed. If you have leftover spears, save them — they’re great for dipping into whipped feta with hot honey.
Step 3: Add the Aromatics
This is the fun part. Push the fresh dill sprigs down into the jars, tucking them between the cucumber spears so they’re nestled in nice and cozy.
Scatter the thinly sliced garlic and pickling spices into each jar. Don’t be shy — this is where all that bold, rustic flavor comes from. The garlic especially makes these pickles absolutely next-level.
Personal opinion: More garlic is always the right answer. I sometimes add an extra clove or two per jar and have zero regrets.
Step 4: Pour the Brine and Seal
Pour the warm (not hot) brine evenly into your jars, making sure the cucumbers are fully submerged. Seal each jar tightly with a lid.
Give the jars a gentle little wiggle to settle everything, then admire your work for a second. You just made homemade dill pickles. Look at you.
Step 5: Refrigerate and Wait (the Hard Part)
Pop the jars in the refrigerator and try your absolute best to wait 24 hours before cracking one open. The brine needs time to work its magic and soak into every bit of the cucumber.
After 24 hours, they’re ready. They keep in the fridge for up to one month — discard any leftovers after that, though I’ve never once had a jar last that long.
Expert Tips, Variations, and Troubleshooting
Tips for the Crunchiest Pickles
Always use firm, fresh cucumbers. Cucumbers that have been sitting in the fridge for a week will make soft pickles, no matter how perfect your brine is.
You can also try adding a small grape leaf or a pinch of black tea leaves to each jar. Both contain tannins that help keep pickles extra crisp. Old-school trick, but it genuinely works.
Fun Variations to Try
Want some heat? Tuck in a sliced fresh jalapeño or a pinch of red pepper flakes. These become a spicy pickle Chilton-style snack that’s completely addictive.
For a sweeter spin, bump the sugar up to 5 tablespoons and dial back the garlic. Think bread-and-butter vibes, but still with that fresh dill backbone. You could also swap cucumber spears for thin rounds if you want pickle slices for burgers and sandwiches.
Troubleshooting
If your pickles turn out soft, the cucumbers were likely too large, too old, or the brine was poured in while too hot. Next time, let the brine cool more and choose the smallest, firmest cucumbers you can find.
If the brine looks cloudy after a couple of days, that’s normal. It’s just the garlic and spices doing their thing. As long as everything smells good (tangy and garlicky), you’re totally fine.
If the pickles taste too salty or too sour straight away, give them another 12–24 hours. The flavors mellow and balance out beautifully as they continue to marinate.
Storage Instructions
| Storage Method | Container | Duration |
|---|---|---|
| Refrigerator (sealed jar) | Glass jar with tight lid | Up to 1 month |
| Refrigerator (opened jar) | Keep in same brine | Up to 1 month from original date |
| Freezer | Not recommended | Texture becomes mushy |
Reheating and No-Waste Ideas
These pickles are a cold snack, so no reheating needed. But that leftover brine? Don’t you dare pour it down the drain.
Use the brine to pickle leftover onion slices, radishes, or even jalapeños. It’s also brilliant stirred into a creamy hollandaise sauce for a tangy brunch twist. Pickle brine also makes an unexpectedly great salad dressing base — just whisk in a little olive oil and mustard.
Nutritional Information
Estimates are per serving (approximately 1–2 spears), based on 16 servings.
| Nutrient | Per Serving (approx.) |
|---|---|
| Calories | 10 kcal |
| Carbohydrates | 2g |
| Protein | 0g |
| Fat | 0g |
| Sodium | 580mg |
| Sugar | 1g |
Frequently Asked Questions
Can I use regular cucumbers instead of pickling cucumbers?
Yes, but smaller is always better. Boston pickling cucumber recipes typically call for small, unwaxed cucumbers because they stay firmer longer. If you use regular cucumbers, peel them first since the wax coating can prevent brine absorption.
Do I need to sterilize the jars?
Since these are refrigerator pickles (not shelf-stable), you don’t need to go through a full canning process. Just make sure your jars are clean and dry before filling. A quick wash with hot soapy water does the job perfectly.
Can I reuse the brine for a second batch?
You can use leftover brine to quick-pickle other veggies like carrots, radishes, or red onions. For a fresh batch of homemade pickles dill, though, it’s best to make a new brine so the flavor and salt levels are just right.
Why are my pickles not very dill-forward?
Fresh dill is the star here, so if the flavor feels weak, add a couple of extra sprigs to the jar. Dill loses its punch quickly once cut, so using the freshest sprigs you can find makes a huge difference in the final result.
What can I serve these with?
Honestly, everything. They’re incredible alongside sandwiches, burgers, and charcuterie boards. They even make a fun, tangy garnish for cocktails. Pair them with something indulgent like a slice of heaven on earth cake for a sweet-and-sour combo that surprisingly works.
Make These Today and Share the Crunch
These homemade pickles dill are honestly one of those kitchen projects that feels way more impressive than the effort involved. A quick brine, some fresh dill, good garlic, and 24 hours of patience is all it takes.
Whether you’re making rustic pickled cucumbers for a cookout, a brunch spread, or just because you had cucumbers to use up, this recipe never lets you down.
If you’re in the mood for more fun snack ideas, check out these edible aquarium popsicles for something totally playful and crowd-pleasing.
Tried this recipe? Save it to Pinterest so your fellow pickle lovers can find it too, and drop a comment below to let me know how yours turned out. Did you go classic, or did you sneak in some extra garlic? I want to hear all about it.
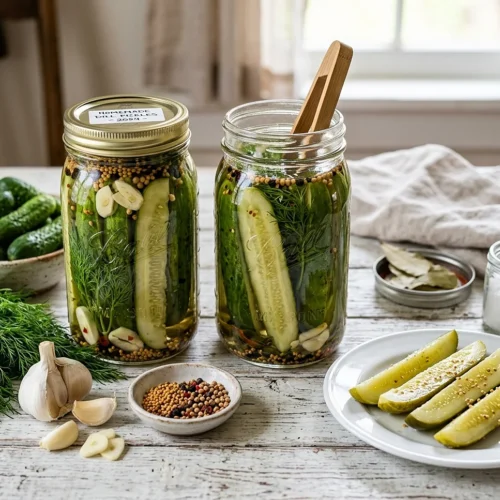
Homemade Dill Pickles
Equipment
- Medium saucepan
- Glass jars with lids
- Cutting board
- Chef’s knife
- Measuring cups
- Measuring spoons
Ingredients
Brine
- 3 cups water
- ¾ cup white vinegar
- 3 tablespoons granulated sugar
- 2 tablespoons kosher salt
Cucumbers
- 6 small cucumbers Boston pickling cucumbers preferred; firm and unwaxed
Aromatics & Spices
- 8 sprigs fresh dill use the freshest sprigs available for best flavor
- 4 cloves garlic peeled and thinly sliced
- 2 tablespoons pickling spice blend
Instructions
- In a medium saucepan, combine the water, white vinegar, granulated sugar, and kosher salt. Bring to a boil over medium to medium-high heat, then reduce the heat to low and simmer for 15 minutes. Remove from heat and set aside to cool before using.
- Wash the cucumbers thoroughly. Cut each cucumber into 4 spears for a total of about 24 spears. If any spears are too tall to fit inside your jars without sticking out the top, trim one end so they fit properly. Pack the spears tightly into your jars — any leftover spears can be saved for another use.
- Push the fresh dill sprigs down into the jars, tucking them between the cucumber spears. Add the thinly sliced garlic and pickling spices evenly among the jars.
- Pour the warm (not hot) brine evenly into each jar, making sure the cucumbers are fully submerged. Seal each jar tightly with a lid.
- Refrigerate for at least 24 hours before serving to allow the brine to fully penetrate the cucumbers. Keep refrigerated and consume within one month. Discard any leftovers after 1 month.